

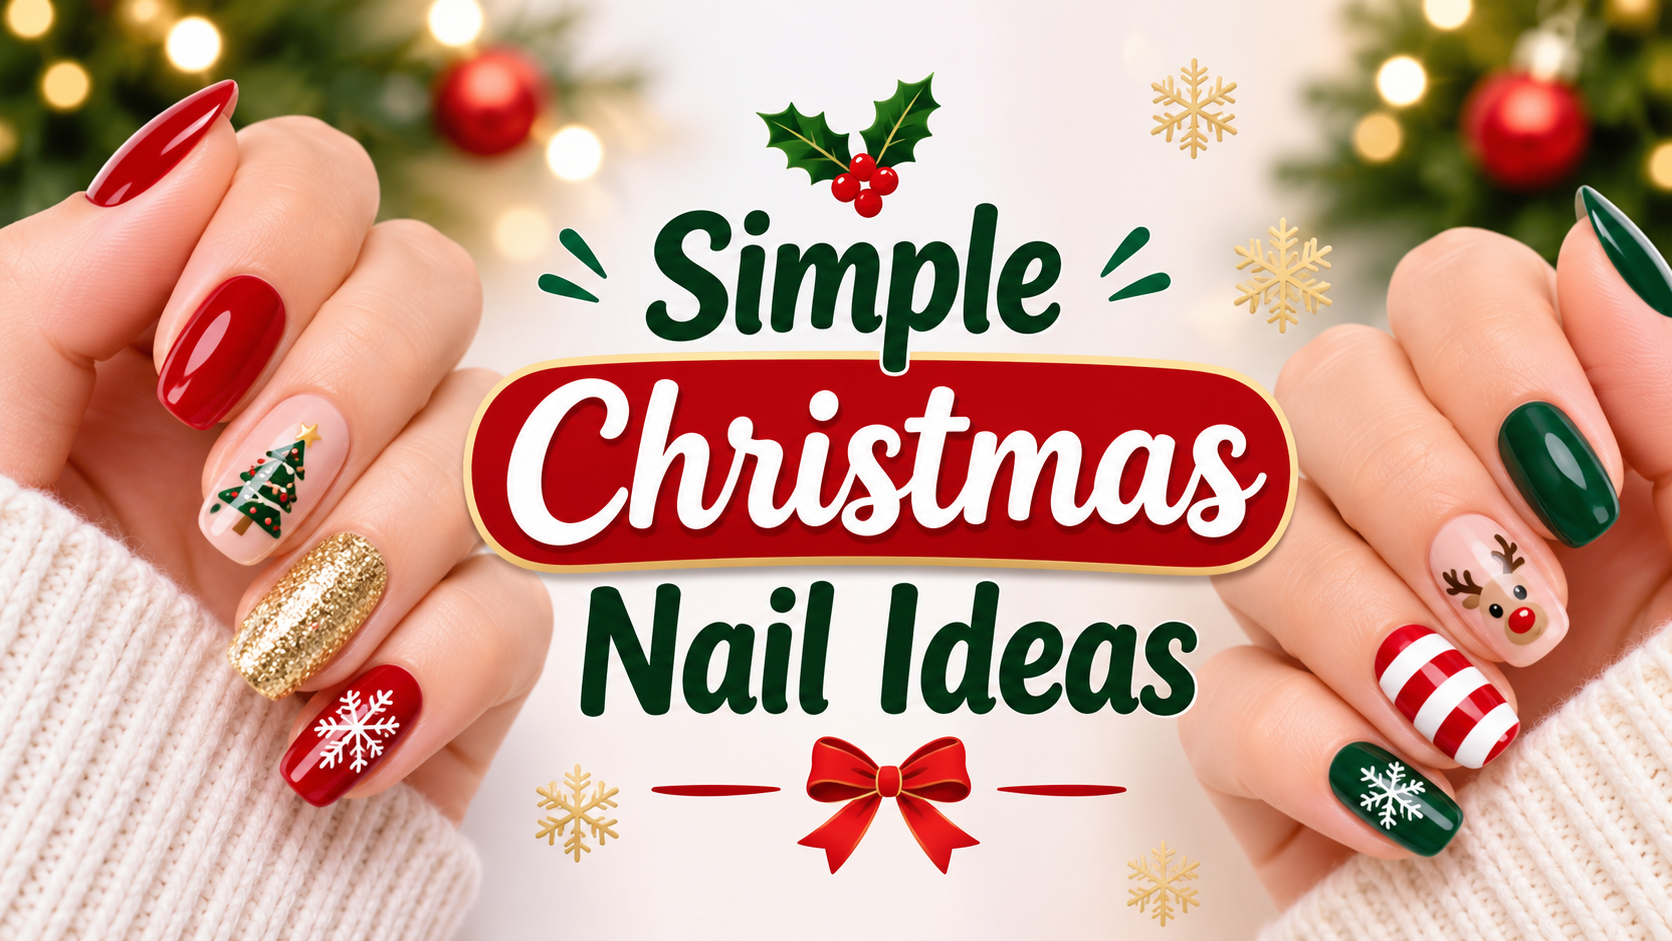
Christmas is the perfect time to have fun with your manicure, but you don’t need complicated nail art or expensive salon designs to make your nails look festive. Sometimes, a few tiny snowflakes, simple glitter accents, or classic holiday colors are all you need to create a beautiful Christmas manicure.
Whether you love traditional red and green nails, soft nude shades, glittery finishes, or cute little Christmas details, there are plenty of easy designs you can recreate at home.
23 Simple Christmas Nail Ideas for 2026
These 23 simple Christmas nail ideas are all about keeping things realistic, creative, and beginner-friendly. Most designs use basic nail polish, a thin nail art brush, a dotting tool, or even a toothpick. From minimal snowflakes to adorable Christmas trees, you’ll find something lovely for every style and nail length.
1. Classic Red Christmas Nails
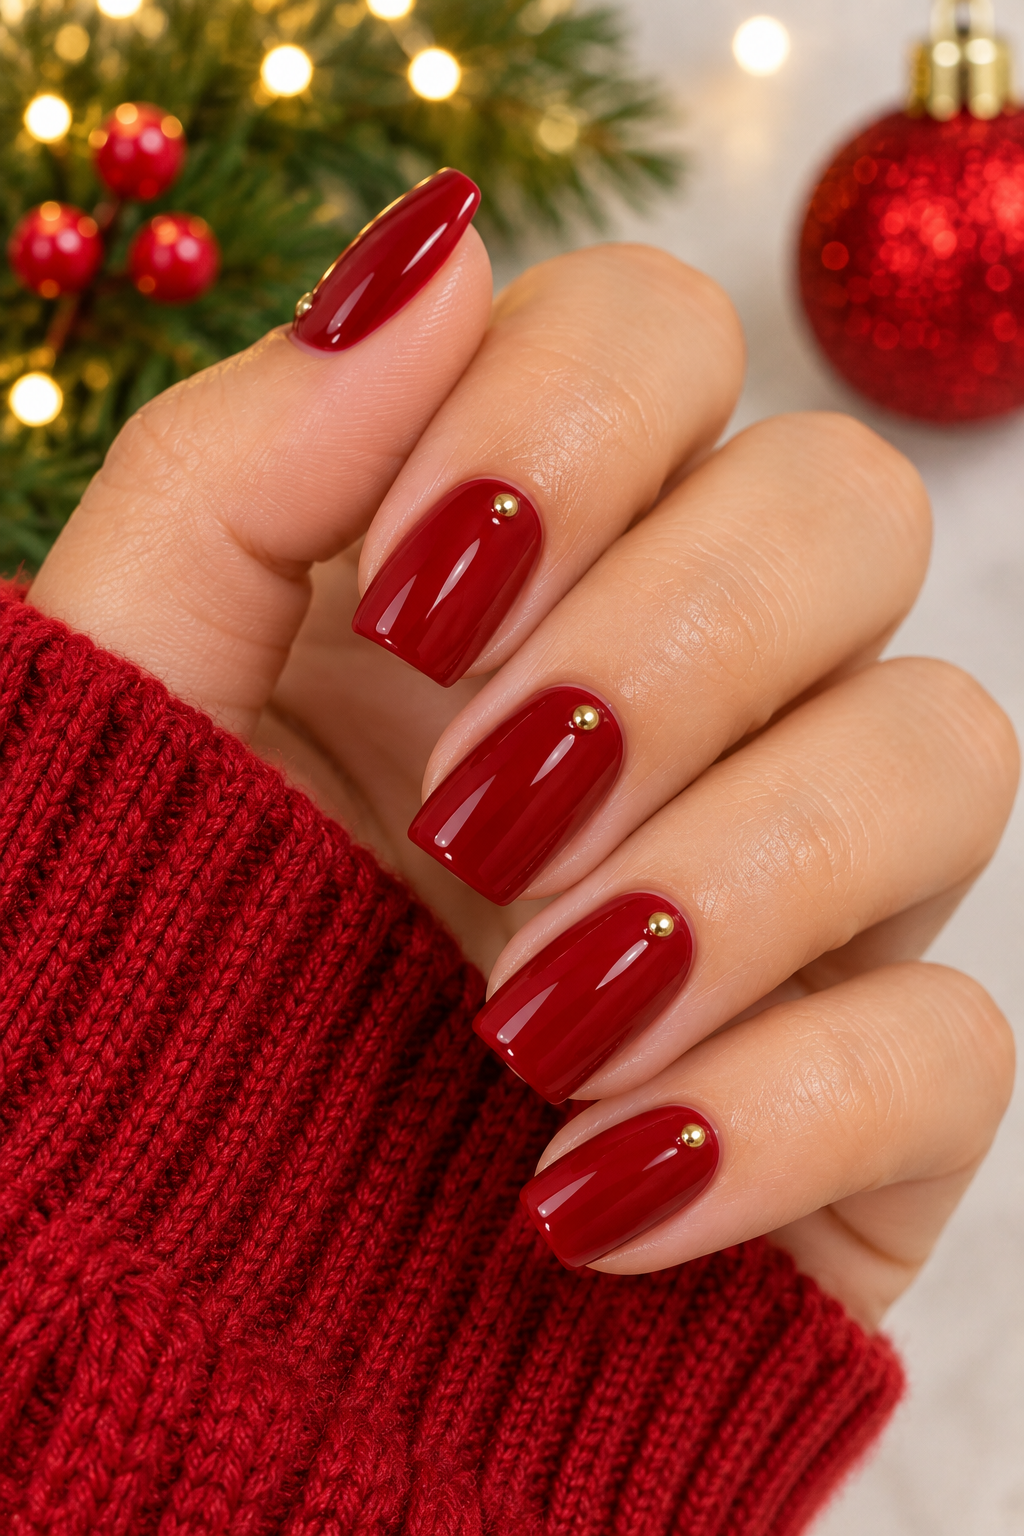
You can never go wrong with classic red nails during Christmas. This timeless manicure is perfect if you want something festive without spending too much time on nail art.
Apply two coats of a rich cherry-red or traditional Christmas-red polish to all your nails. Finish with a glossy top coat for a smooth, salon-like appearance. If you want a little extra detail, add one tiny gold dot near the cuticle of each nail.
It’s one of the easiest Christmas manicures to recreate at home and looks beautiful on short square, oval, and almond nails.
2. Simple White Snowflake Nails
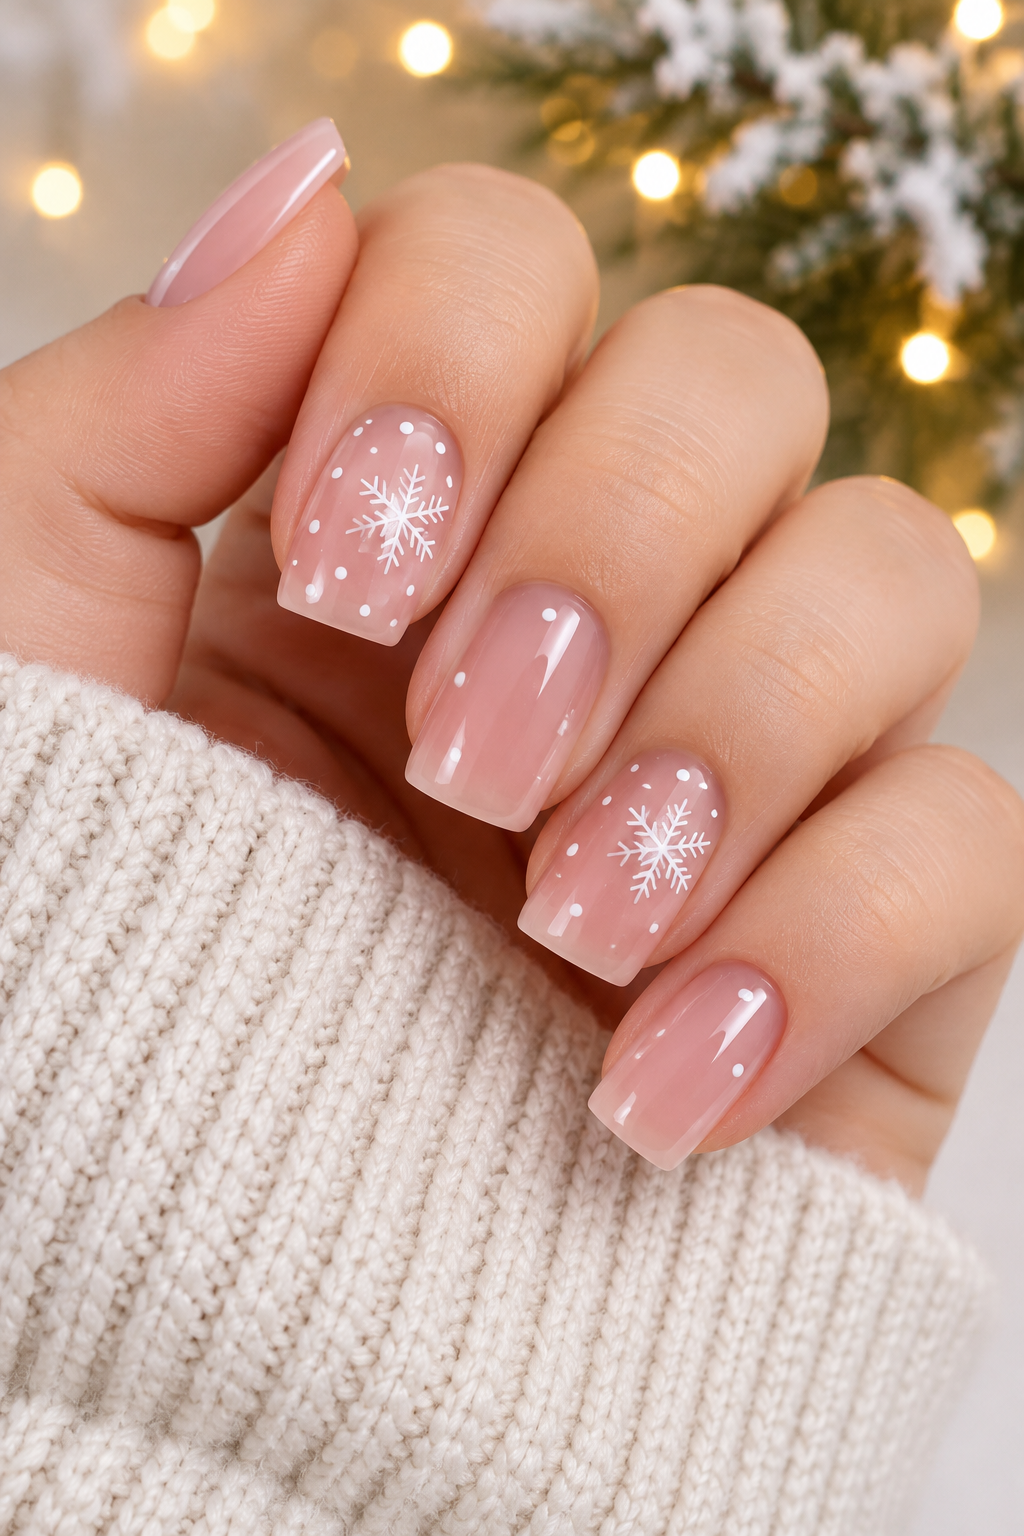
White snowflakes are one of the prettiest ways to give your nails a winter-inspired look. The best part is that you don’t need to paint detailed snowflake patterns to achieve this design.
Start with a sheer pink or milky nude base. Using a thin nail art brush, draw a small white cross on two or three accent nails. Add tiny diagonal lines to the ends to create simple snowflakes.
Finish with a few little white dots to represent falling snow. Keep the patterns small and delicate for a clean, beginner-friendly manicure.
3. Green and Gold Christmas Nails
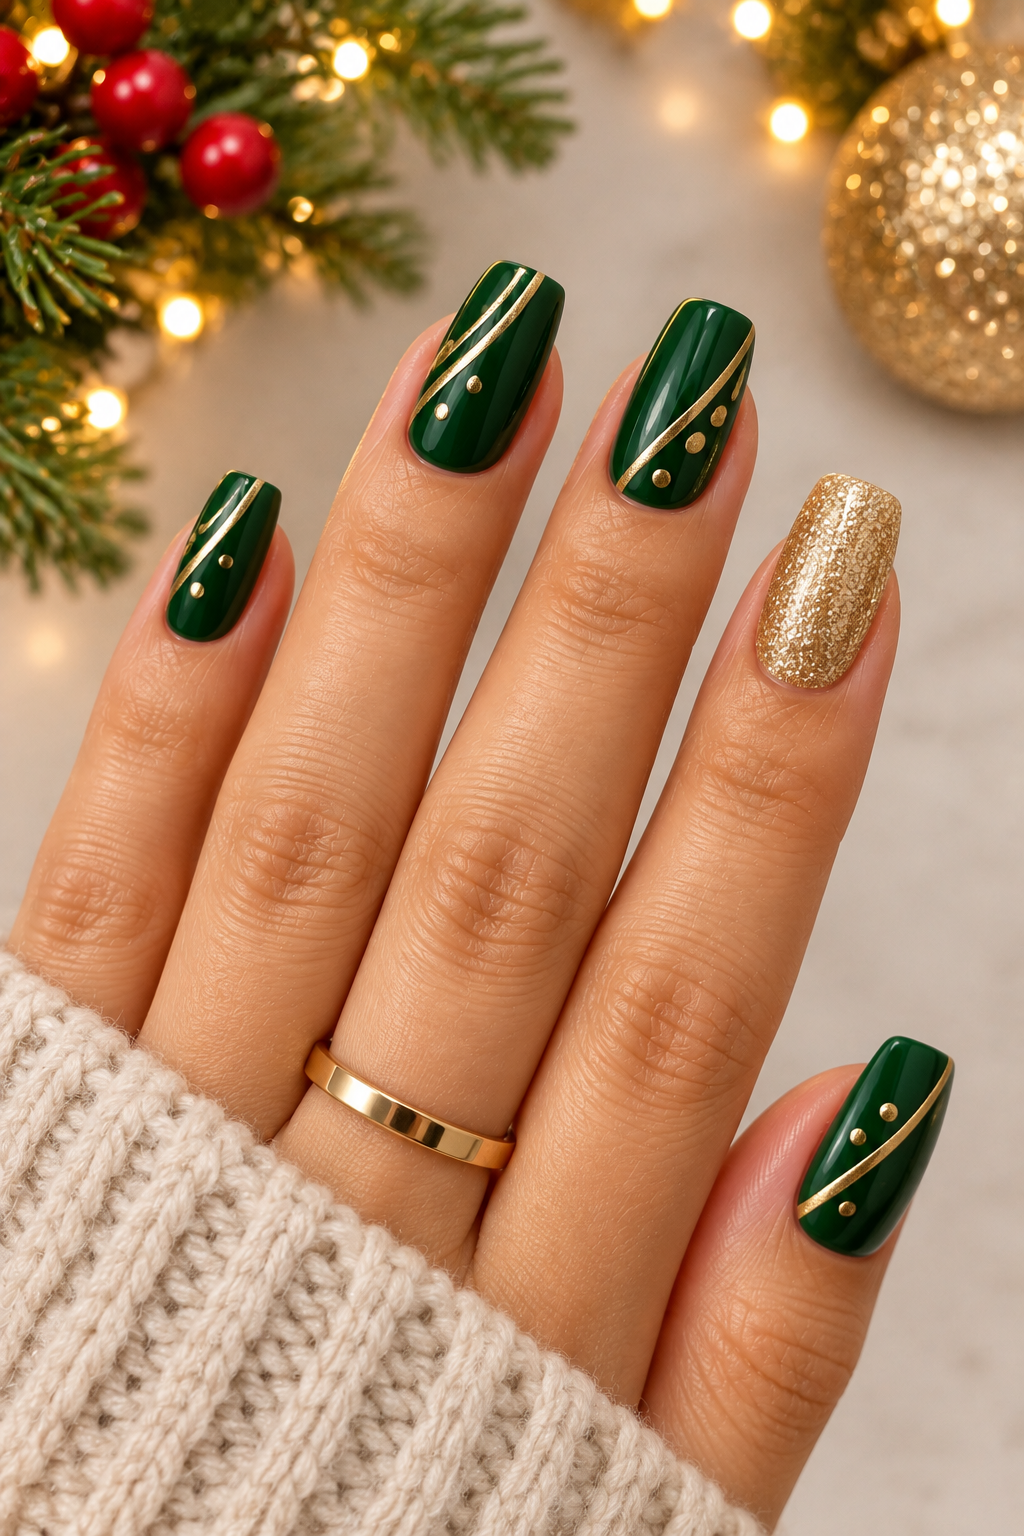
Paint most of your nails in a deep forest-green shade and choose one accent nail for a soft gold finish. You can also add a few tiny gold dots or a thin gold line over the green polish.
This design doesn’t require detailed nail art, making it a great choice if you’re doing your Christmas manicure yourself. The rich green color paired with subtle gold accents creates a gorgeous holiday look.
4. Candy Cane Stripe Nails
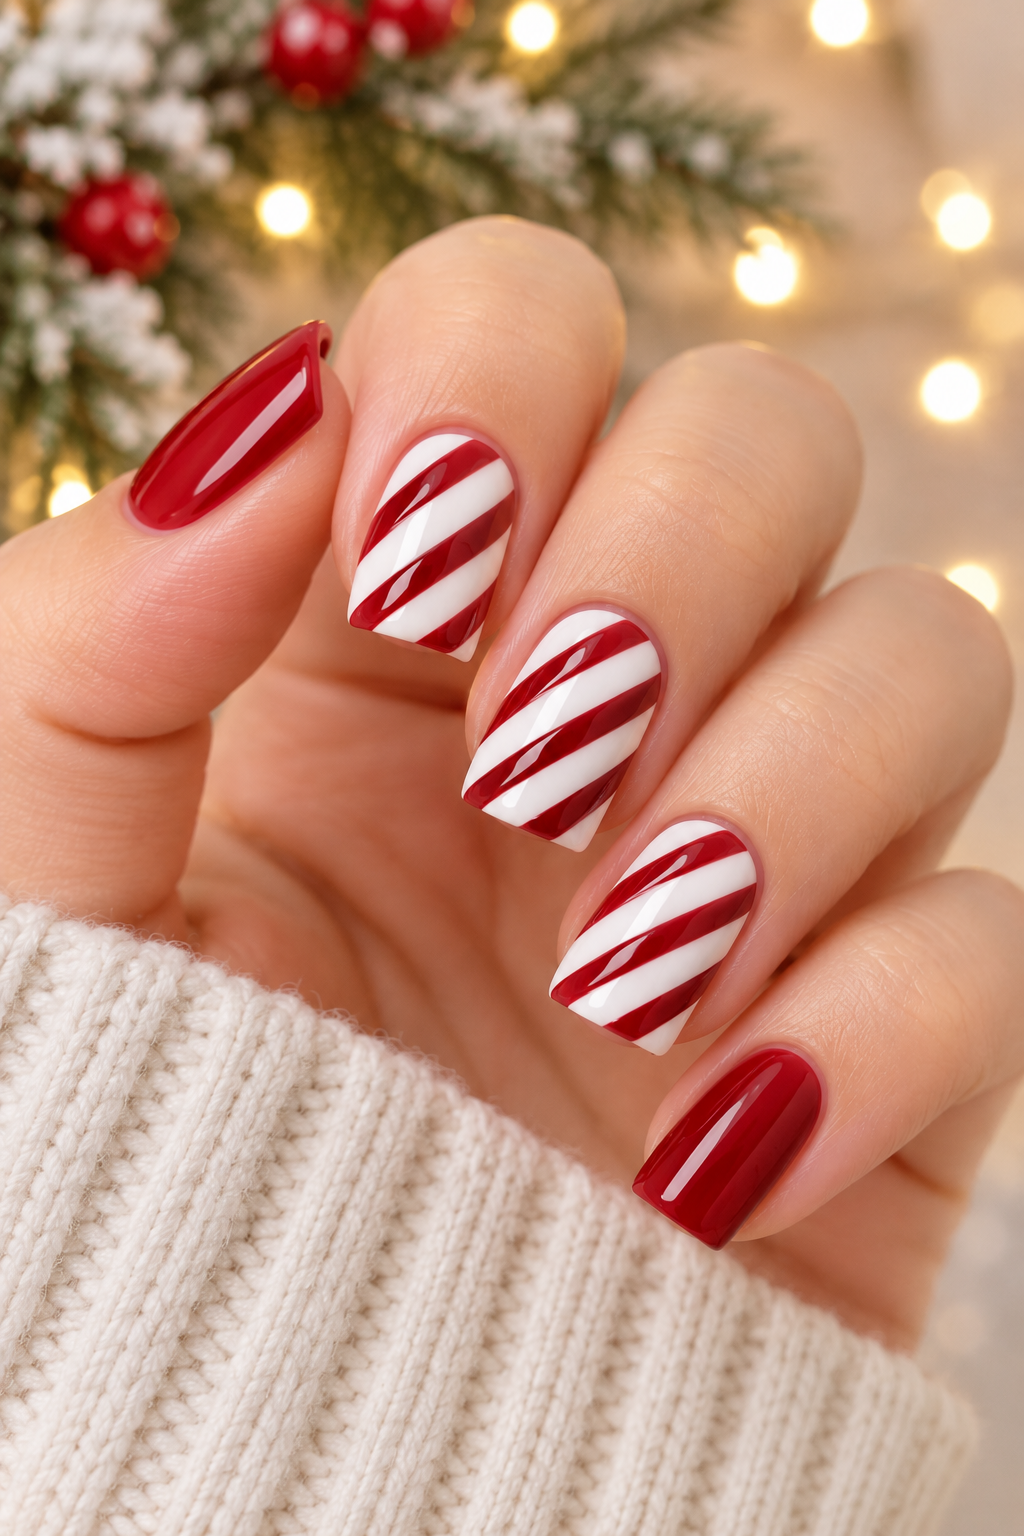
Bring a little sweetness to your Christmas manicure with simple candy cane stripes. This playful design looks adorable without requiring complicated patterns.
Apply a white base coat to two accent nails and let it dry completely. Then use a thin nail art brush to paint a few diagonal red stripes across each nail. Keep the stripes slightly spaced apart for a neat candy cane effect.
Paint the remaining nails in classic red or milky white to complete the look. If you struggle with straight lines, nail striping tape can make the process much easier.
5. Teal and Golden Star Christmas Nails
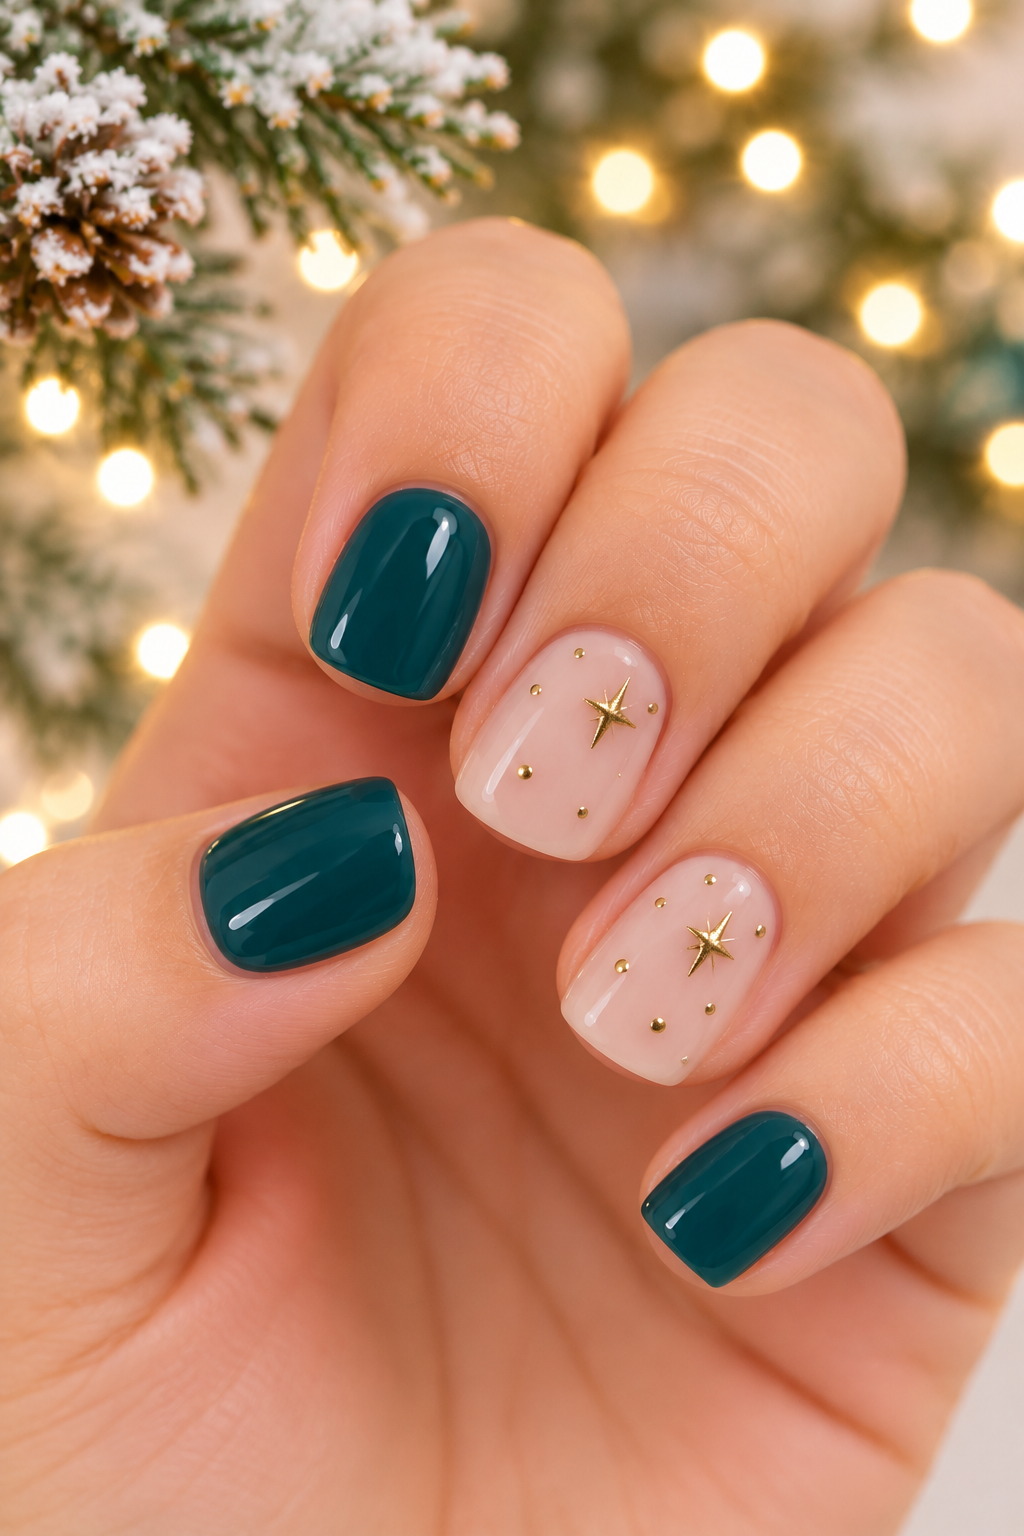
Glossy deep teal square nails alternate with soft nude-pink accent nails decorated with delicate golden stars and tiny gold dots. The rich teal shade adds a sophisticated festive touch, while the minimalist gold details create a delicate sparkle. This elegant combination is perfect for a chic Christmas manicure.
6. Cute Christmas Tree Accent Nails
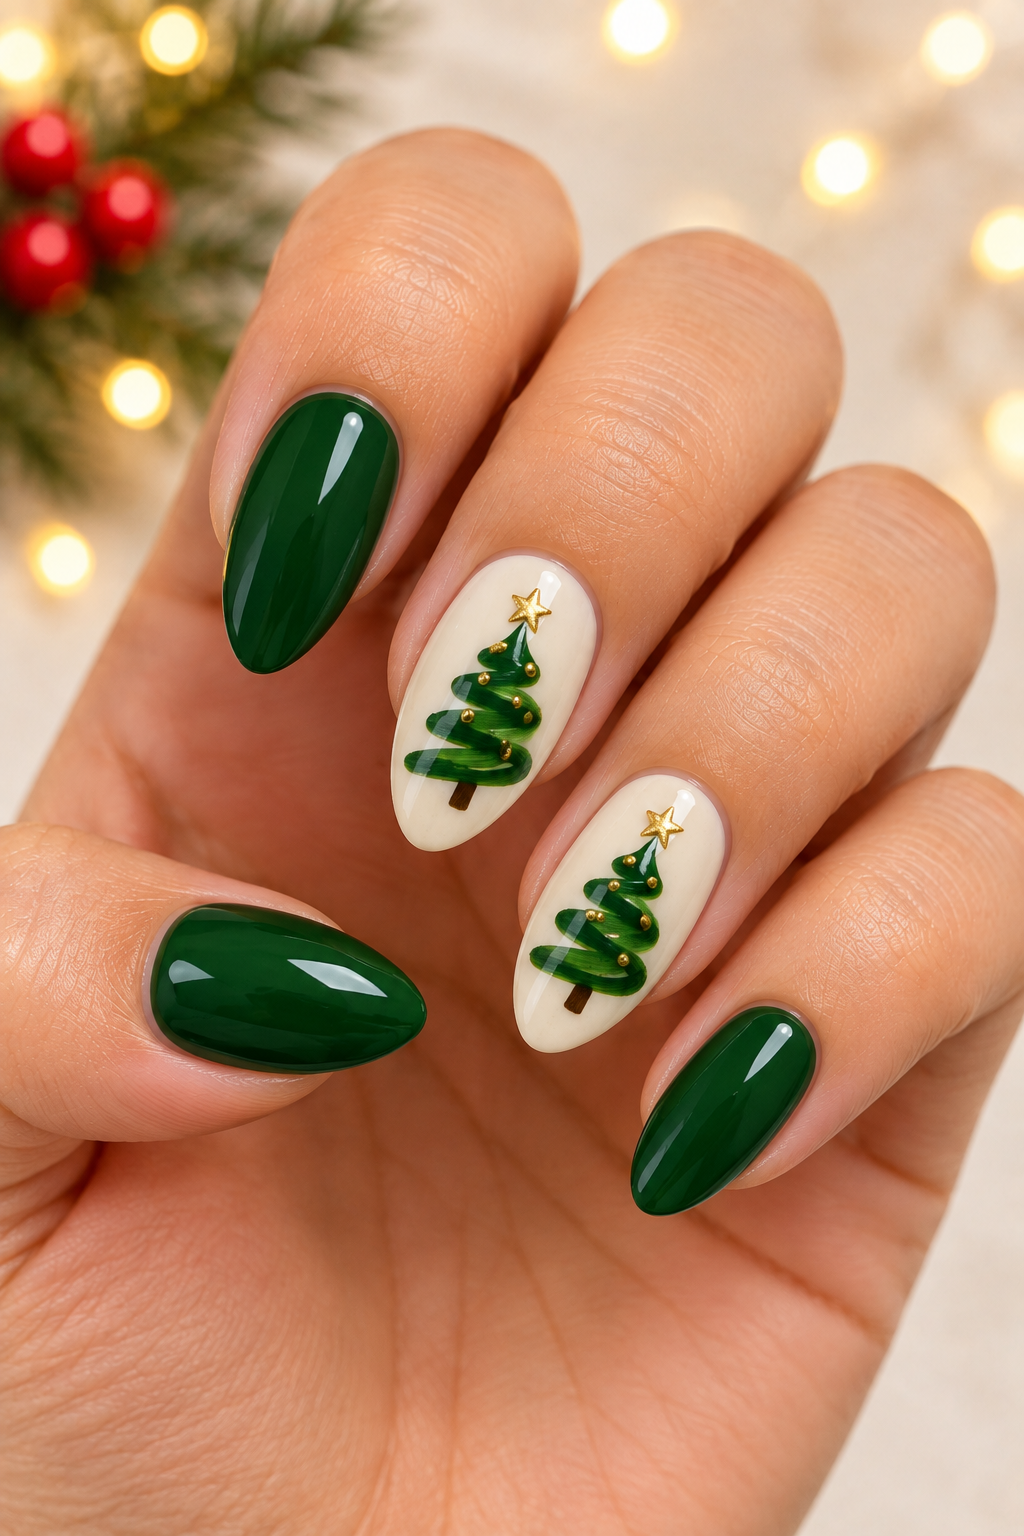
A tiny Christmas tree is one of the easiest ways to make your manicure instantly festive. You only need a green nail polish, a thin brush, and a little patience.
Apply a nude or creamy white base to your nails. On one or two accent nails, paint a simple green triangle or use three small overlapping green strokes to create a Christmas tree shape.
Add a tiny gold dot at the top as a star. Keep the remaining nails plain or paint them in a matching green shade.
7. Red French Tip Christmas Nails
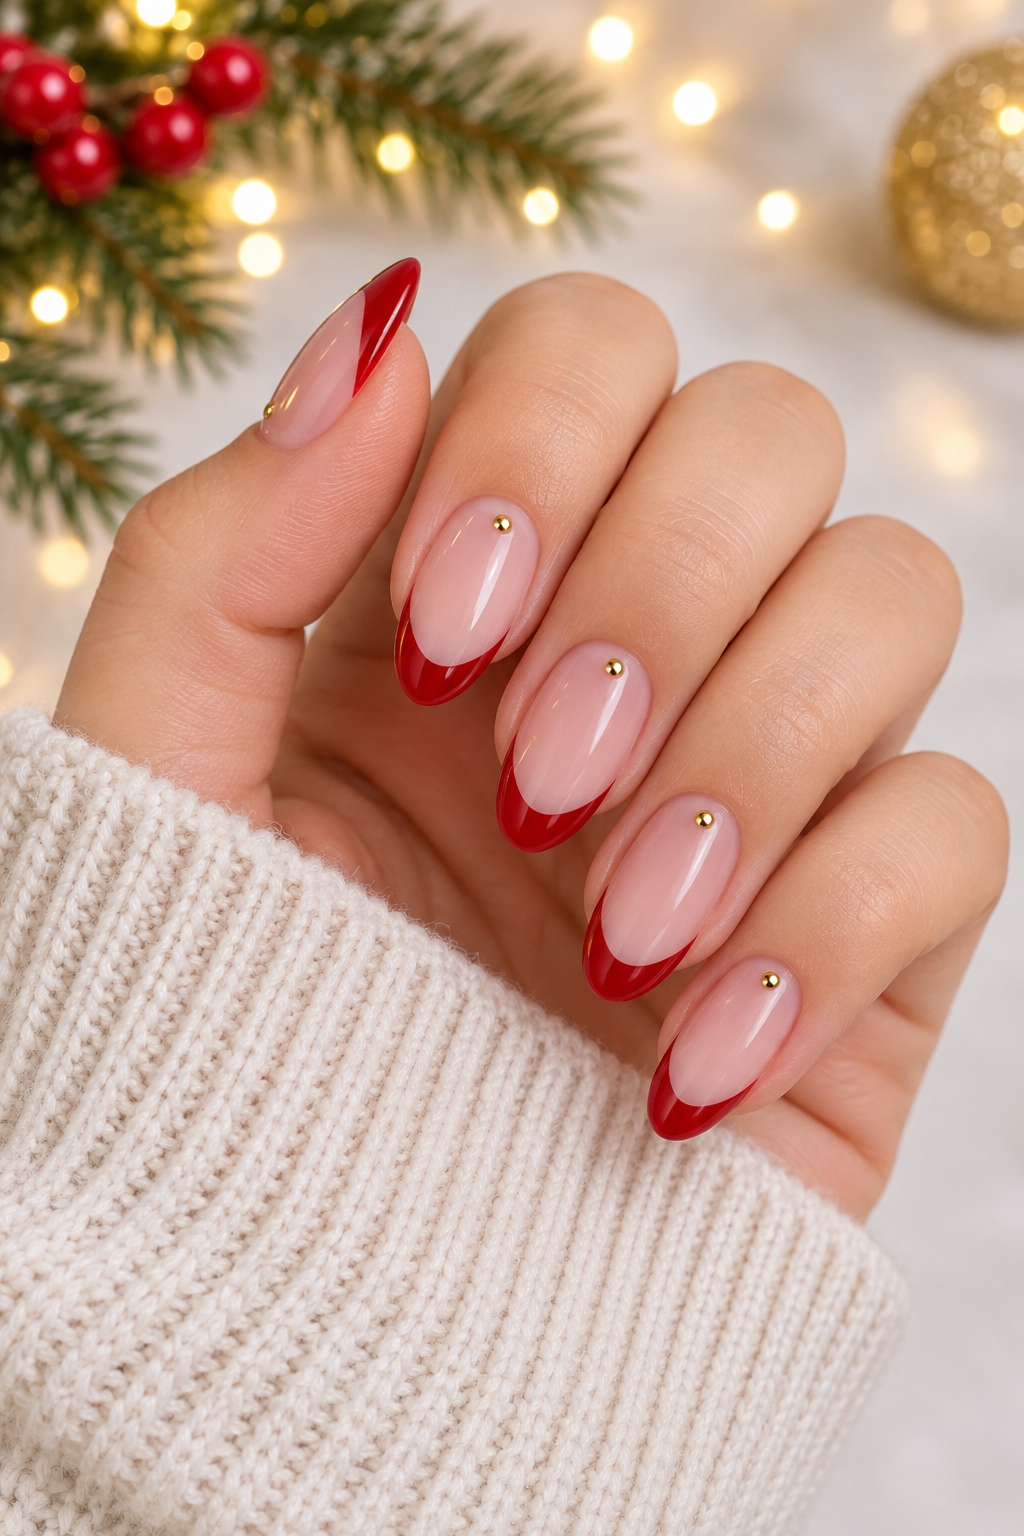
Give your classic French manicure a Christmas makeover with bright red tips. This design is simple, stylish, and easy to wear throughout the holiday season.
Start with a natural pink or sheer nude base. Once dry, carefully paint thin red tips along the edges of your nails. You can use French tip guides if you want a cleaner finish.
For an extra festive detail, add one tiny gold dot near the cuticle of each nail. The result is a beautiful Christmas manicure that doesn’t feel overly decorated.
8. Silver Glitter Christmas Nails
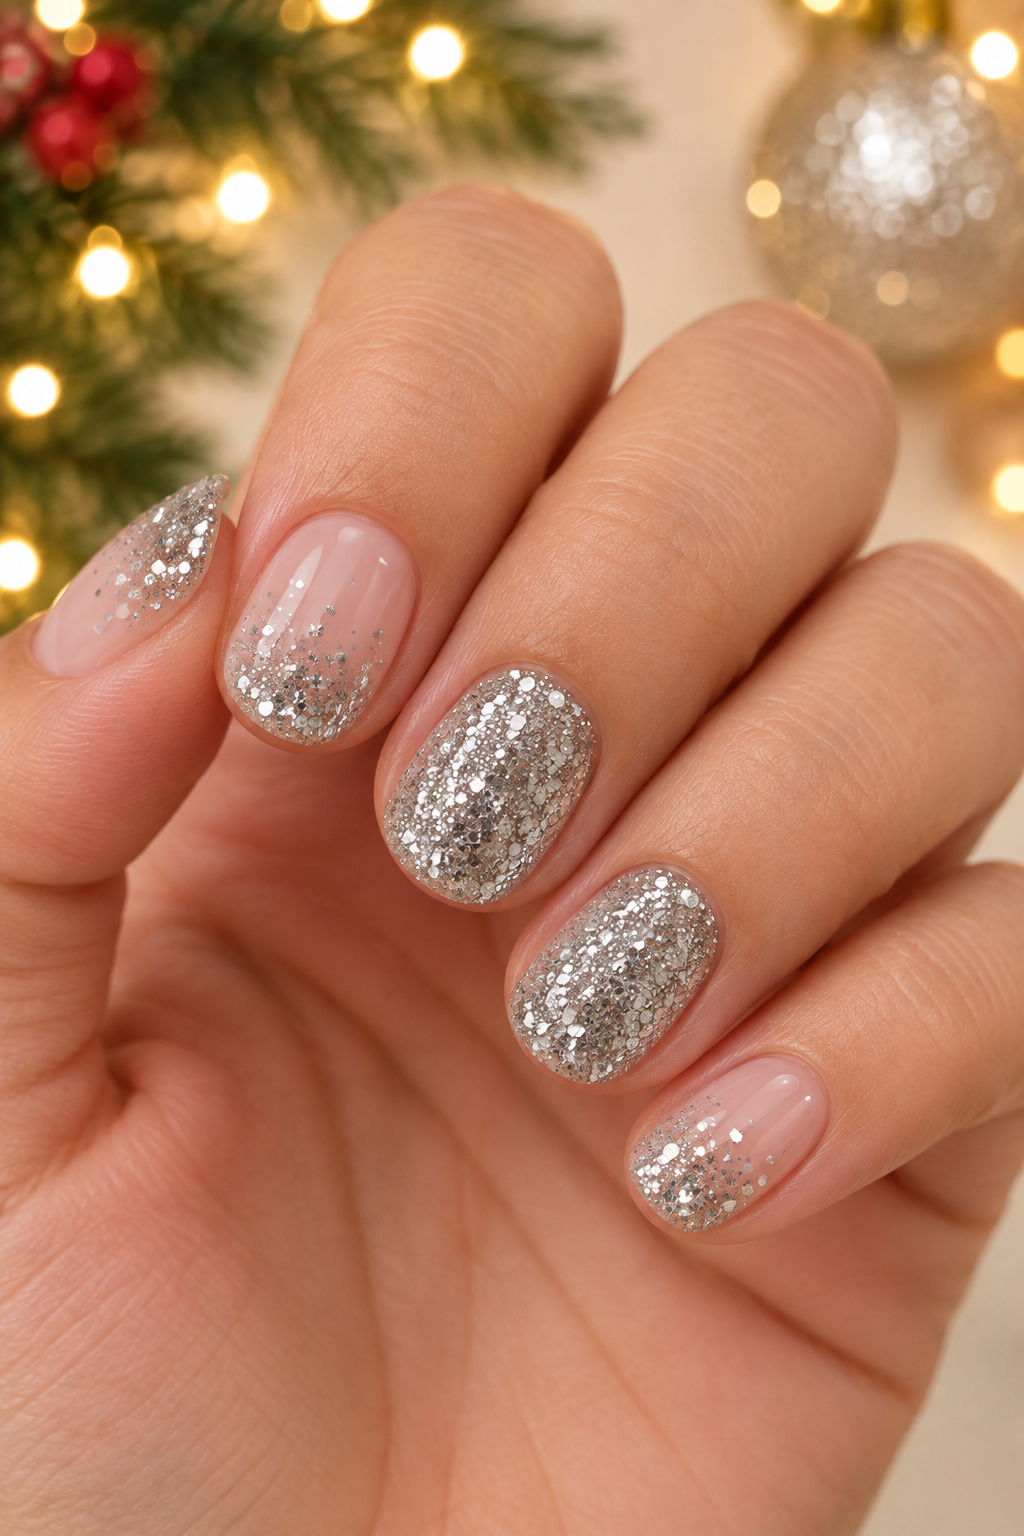
If you love a little sparkle, silver glitter nails are an easy way to celebrate Christmas. You don’t need to cover every nail in glitter to make your manicure stand out.
Apply a soft nude or pale pink base coat. Choose one or two accent nails for fine silver glitter polish, leaving the remaining nails in a simple glossy finish.
You can also apply a little glitter near the tips to create a soft gradient effect. This manicure looks especially pretty under Christmas lights and is easy to recreate with glitter nail polish.
9. Red and White Polka Dot Nails

Polka dots are perfect for anyone who wants cute Christmas nail art without complicated painting techniques.
Paint your nails in alternating red and white shades. Then use a dotting tool or the rounded end of a toothpick to add small dots in the opposite color.
For example, add white dots over red nails and red dots over white nails. Keep the dots evenly spaced for a neat appearance.
This playful design is beginner-friendly and looks adorable on short nails.
10. Frosty Light Blue Christmas Nails
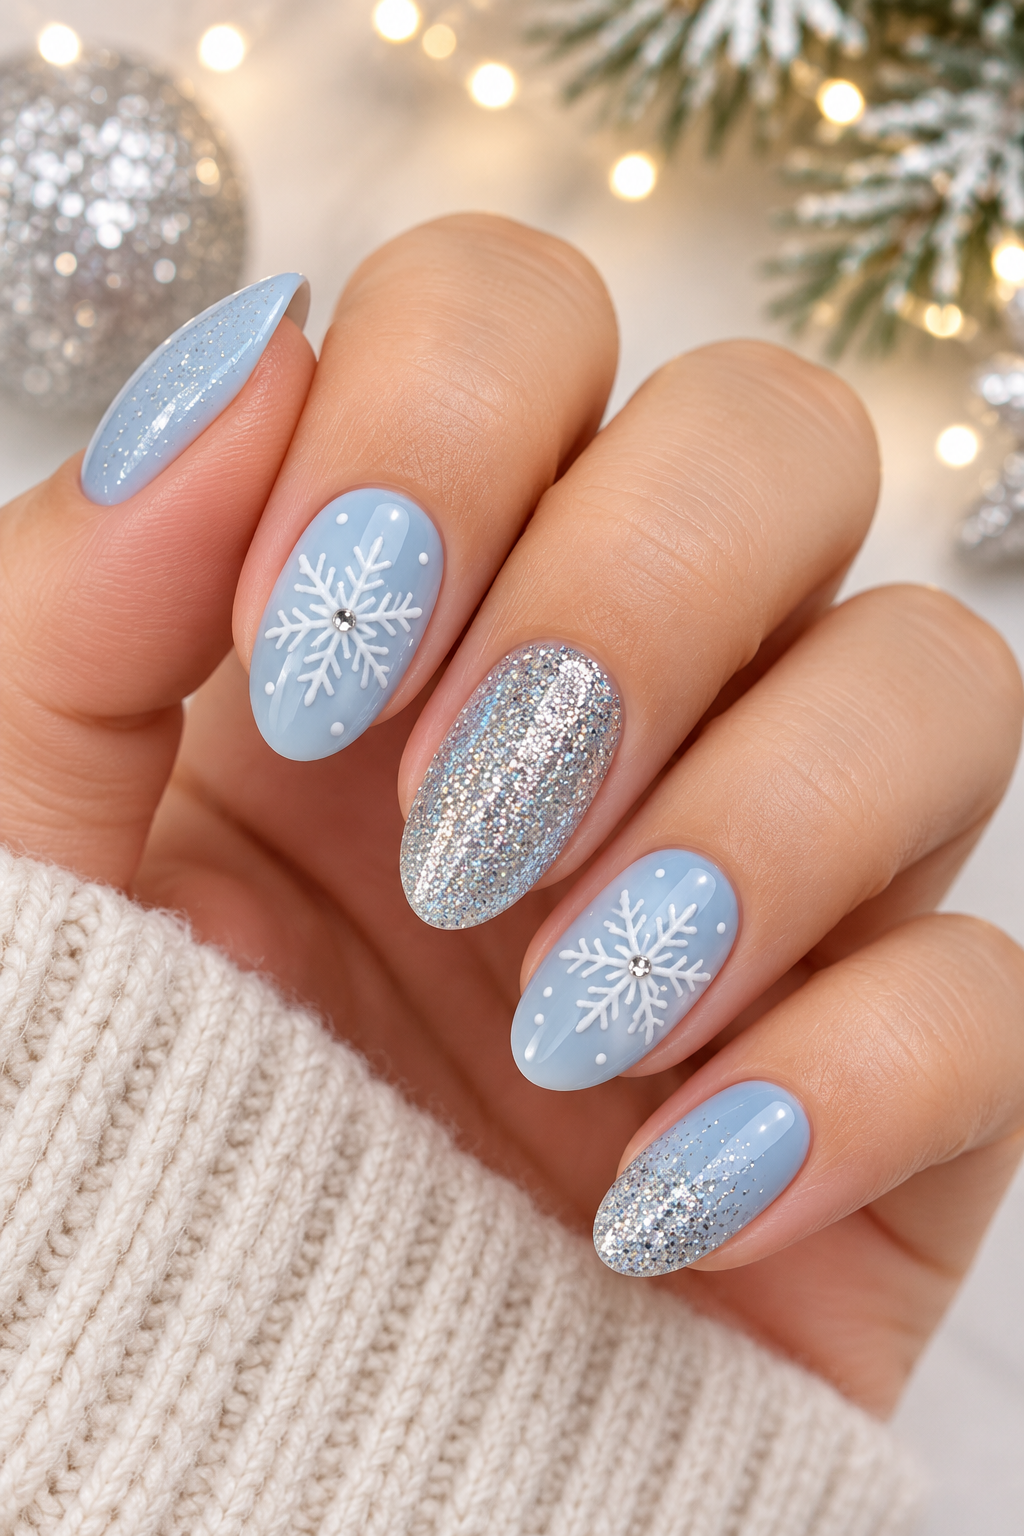
Light blue is a beautiful alternative to traditional Christmas colors. It creates a cool, frosty appearance that feels just right for winter.
Choose a pale icy-blue polish and apply two thin coats. Add small white snowflakes or tiny dots to one or two accent nails.
You can also use a little silver shimmer on the remaining nails to create a subtle icy finish. This design is simple enough for beginners while still looking special for Christmas.
11. White and Gold Glitter French Nails
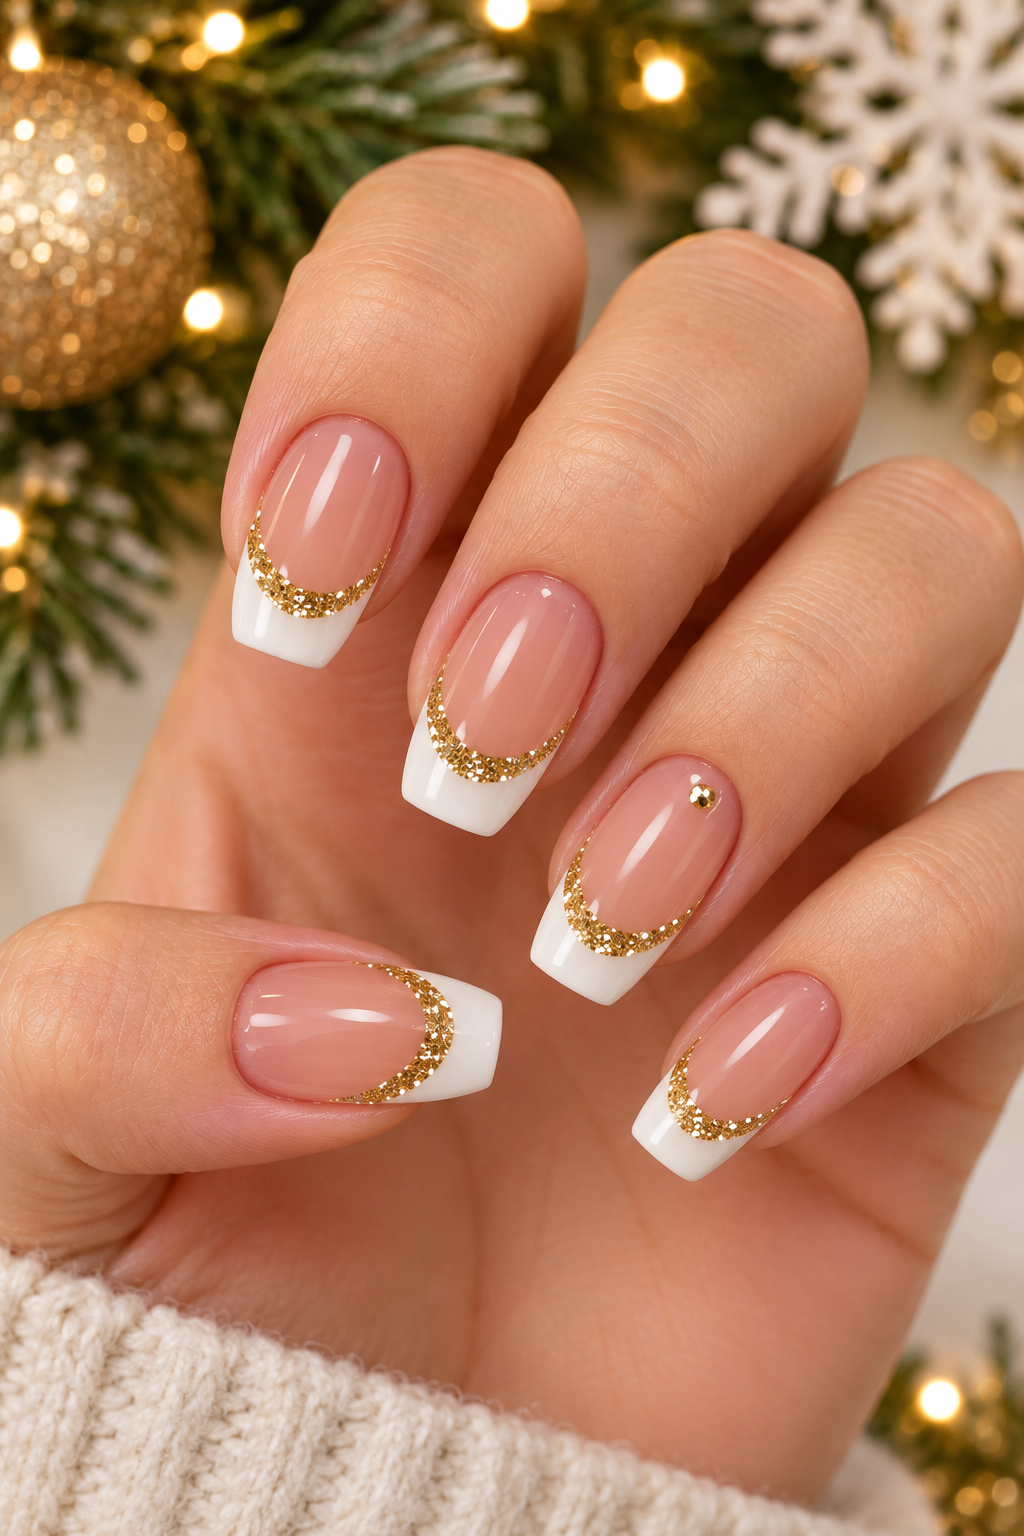
White and gold are a beautiful combination if you want something festive but still elegant.
Apply a sheer nude base and create classic white French tips. Once the tips are dry, add a very thin line of gold glitter just below the white tips.
You can also add one tiny gold dot on each accent nail for a little extra detail. The soft nude base keeps the manicure natural, while the glitter gives it a lovely Christmas finish.
12. Green French Tip Nails
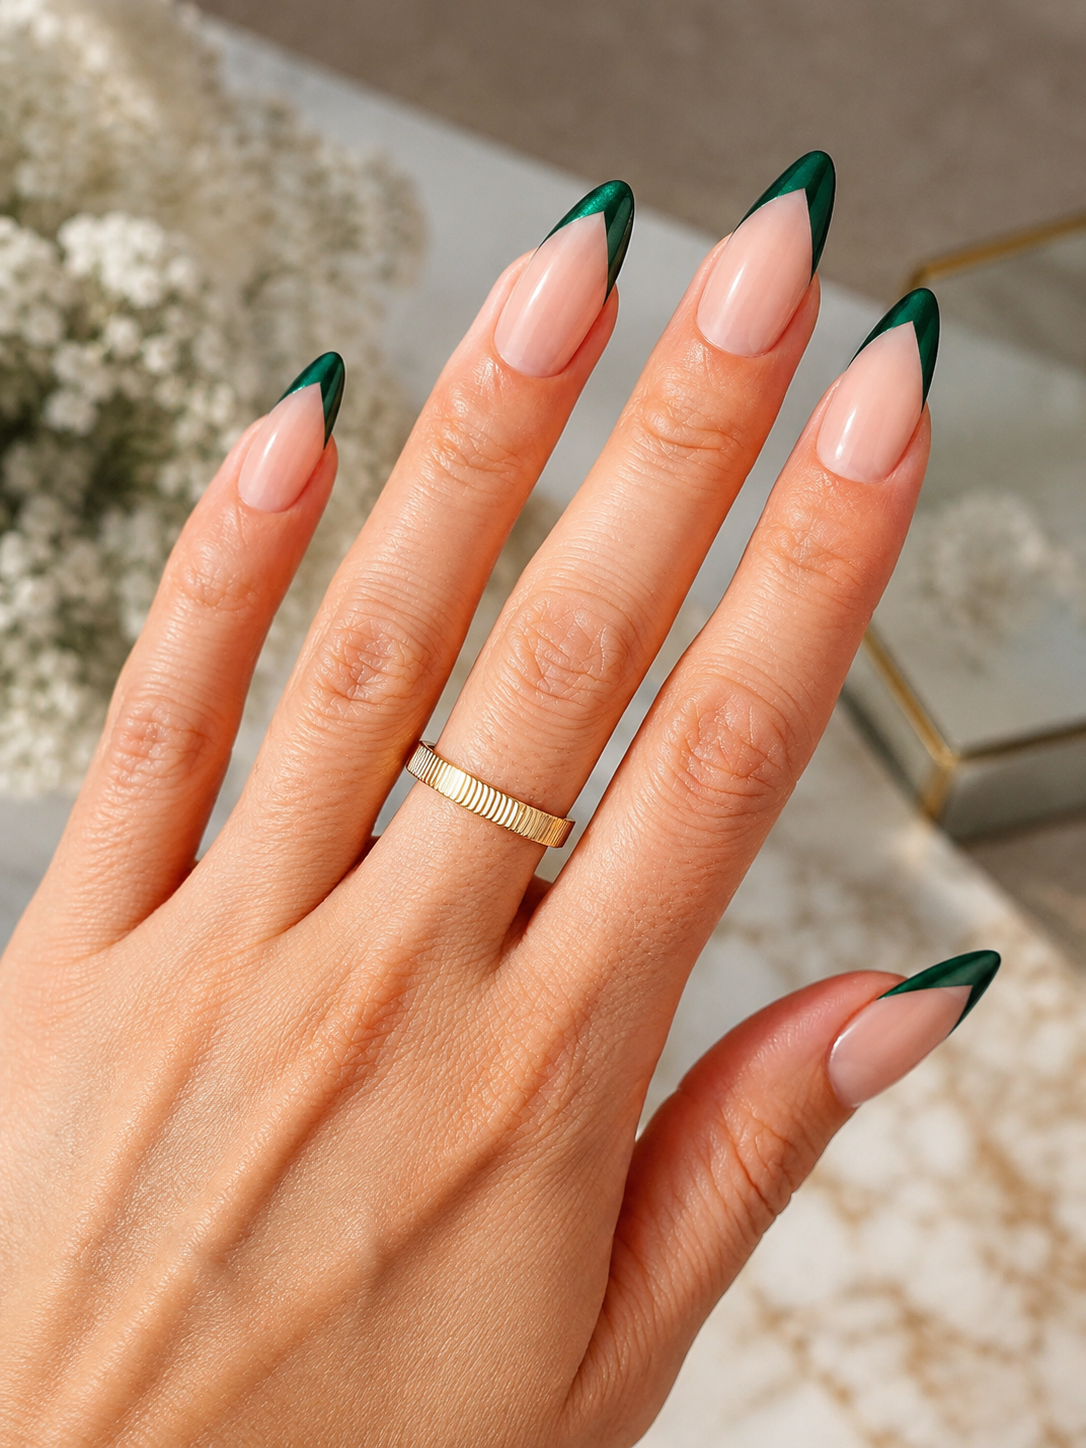
Green French tips are a fresh way to create a Christmas-inspired manicure without decorating every nail.
Apply a sheer nude or pink base and paint the tips in a deep forest-green shade. Keep the tips thin for a minimal appearance or make them slightly thicker if you prefer a bolder look.
You can add one tiny gold dot or a small white star on an accent nail. This design is particularly pretty on square and almond nail shapes.
13. Simple Gingerbread Man Nails
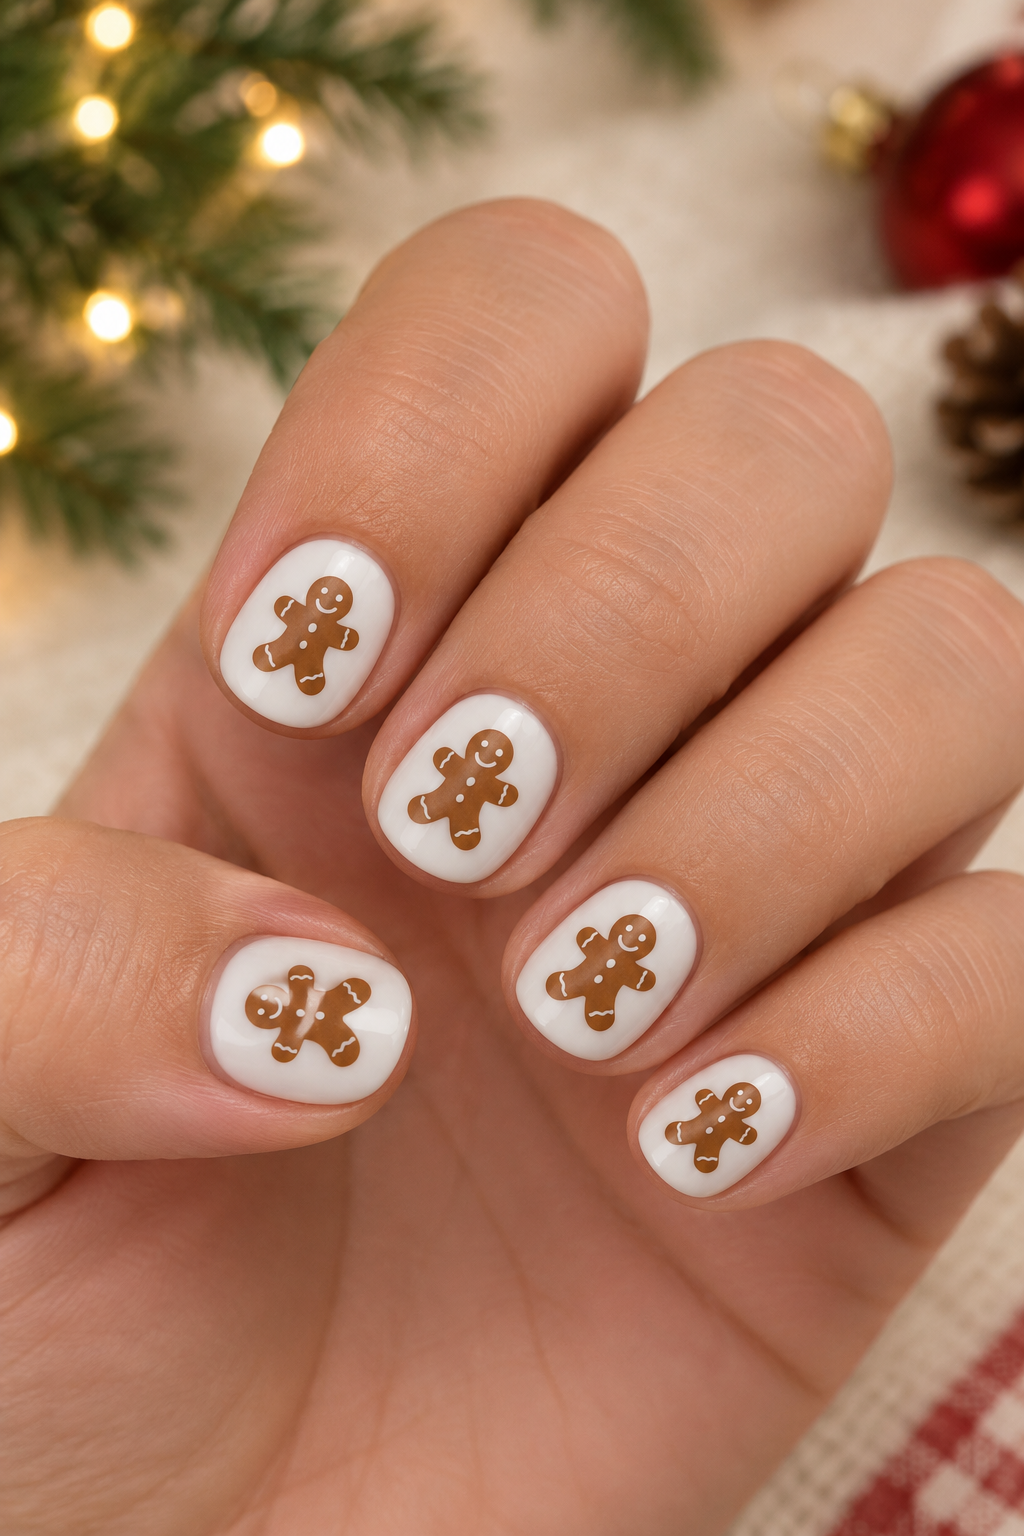
Add a little Christmas cuteness to your manicure with a tiny gingerbread man. You only need one accent nail for this adorable design.
Apply a creamy beige or milky white base. On one nail, use brown polish to create a small rounded gingerbread shape with a tiny head, arms, and legs.
Add two little white dots for buttons and a simple white smile. Keep the rest of your nails in a warm nude or light brown shade.
It’s a fun design that looks handmade and is easy to recreate with a dotting tool and thin brush.
14. Burgundy and Gold Christmas Nails
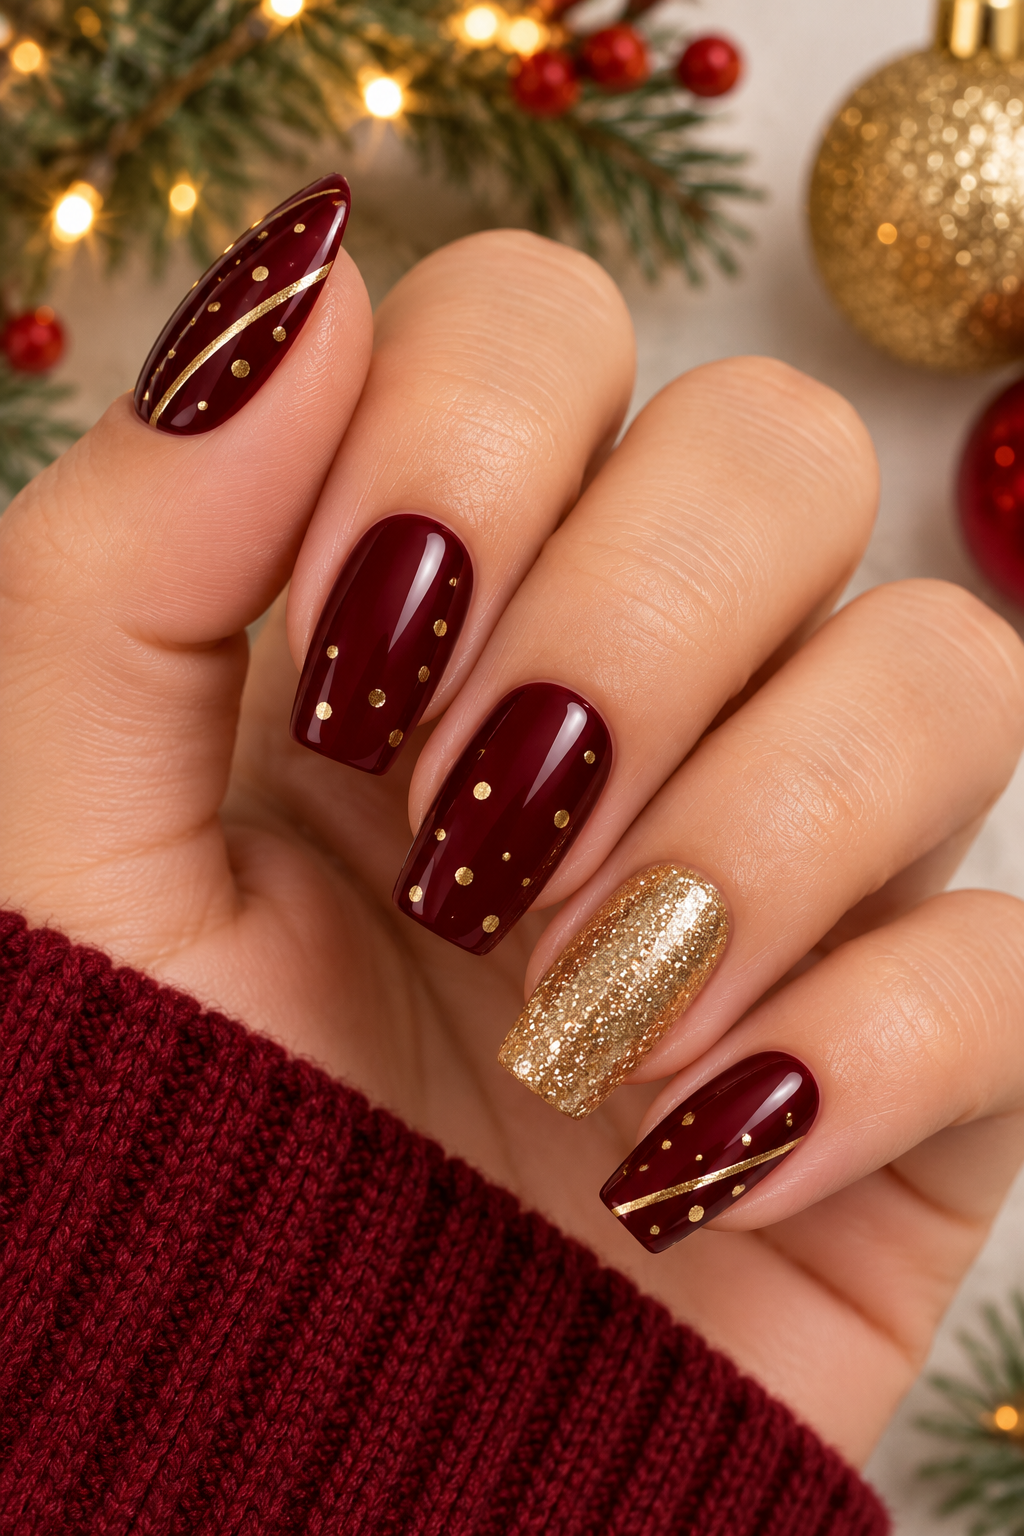
For a rich and sophisticated Christmas manicure, try pairing deep burgundy with delicate gold accents.
Paint your nails in a dark wine-red shade and choose one accent nail for a gold finish. On the remaining nails, add a few tiny gold dots or a thin gold line.
The combination creates a beautiful festive manicure without needing detailed nail art. It’s also a lovely option if you prefer darker colors over traditional bright red.
15. Christmas Present Nail Art
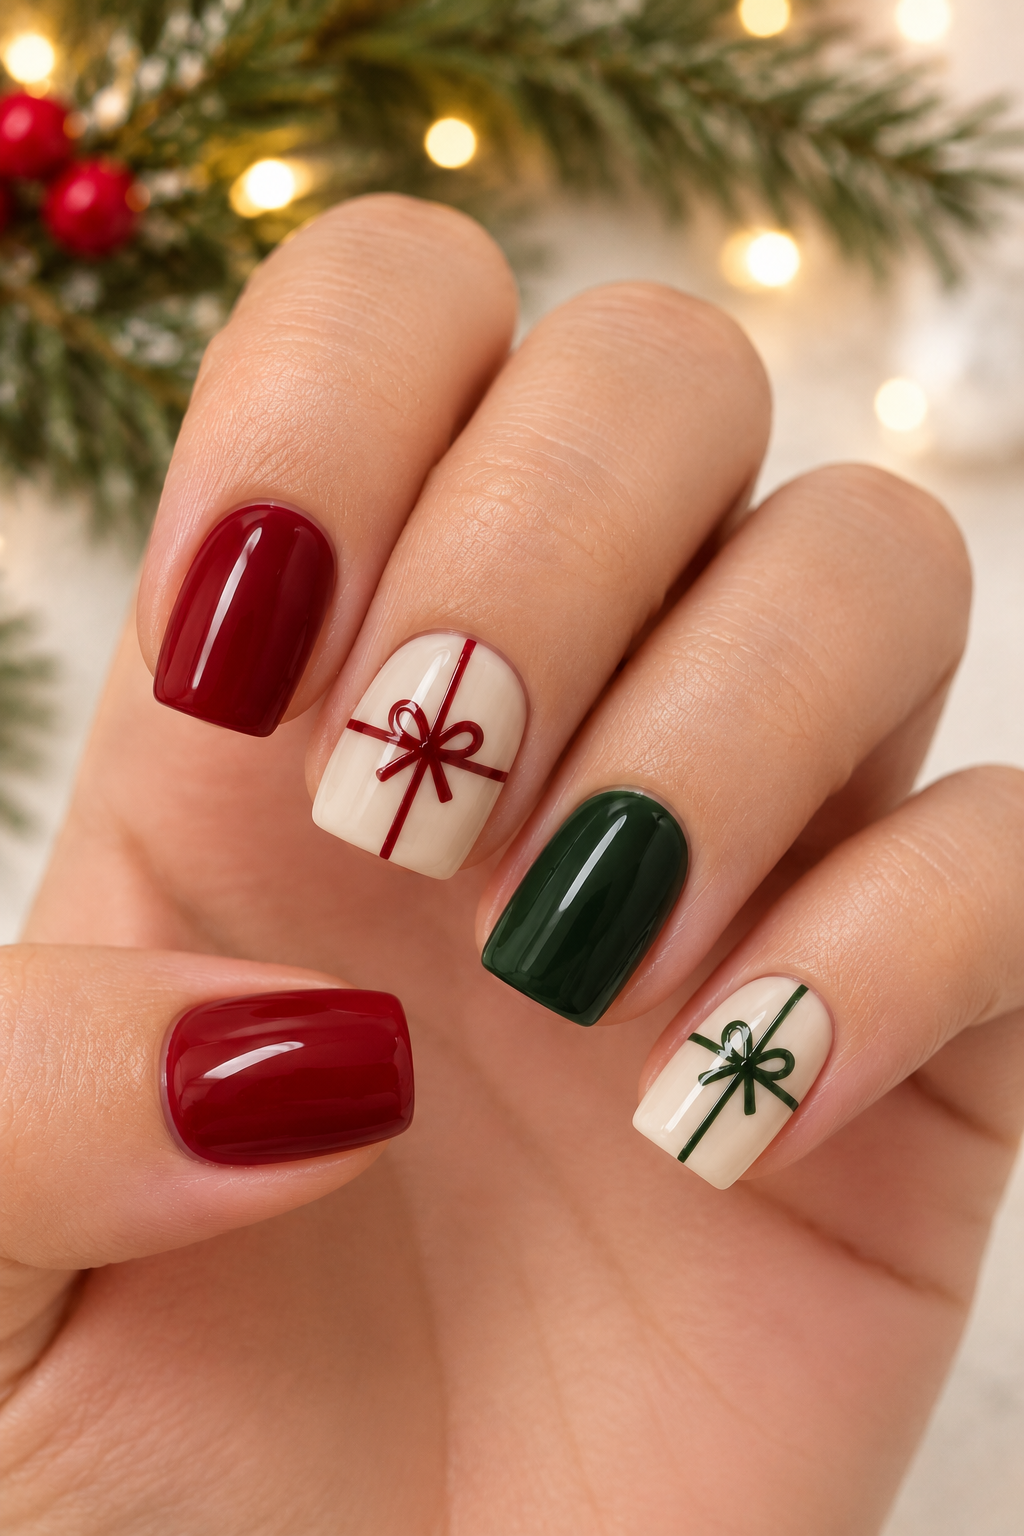
Turn your nails into little Christmas presents with this cute and creative design.
Start with a nude, white, or soft pink base. On one or two accent nails, paint a small red or green square. Use a thin brush to add a vertical and horizontal line across the square, creating the appearance of gift wrapping.
Finish with a tiny bow at the center using two small curved strokes. Keep the other nails in matching solid Christmas colors.
This design looks adorable and is much easier to create than it might seem.
16. Matte Forest Green Christmas Nails
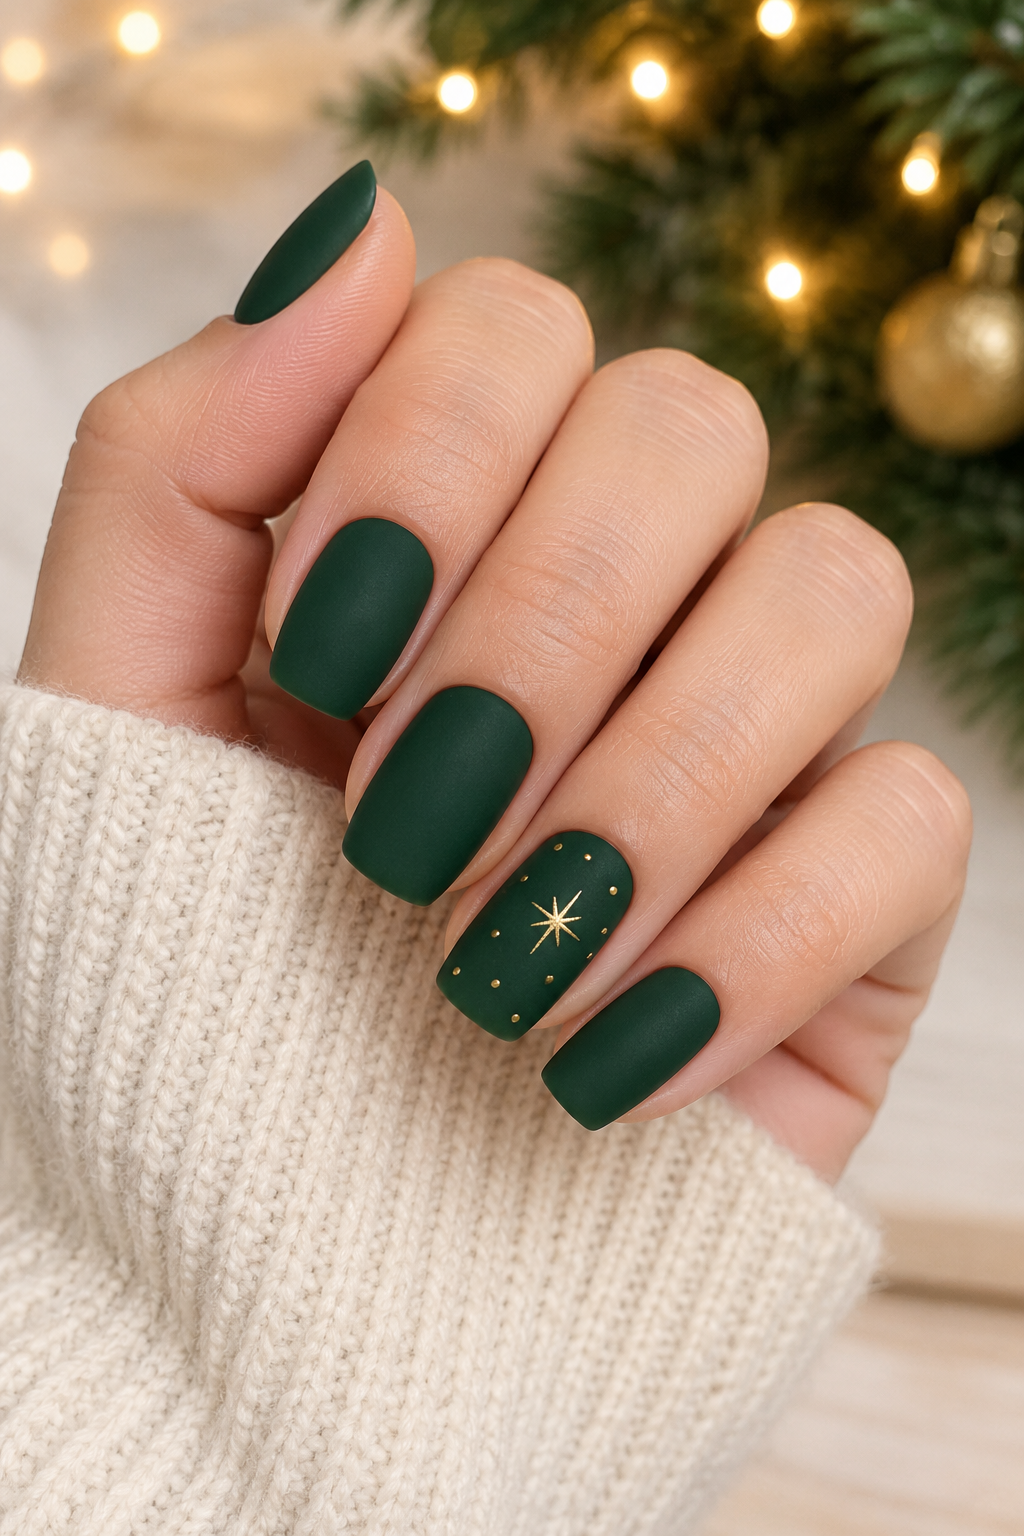
If you want something simple but eye-catching, matte forest-green nails are worth trying.
Apply two coats of deep green polish and finish with a matte top coat. For a little Christmas detail, add tiny gold dots or a small gold star on one accent nail.
The matte finish gives the manicure a soft, velvety appearance, while the gold accents add just enough festive sparkle.
It’s a great choice for anyone who prefers minimal nail art.
17. Pink and White Christmas Nails
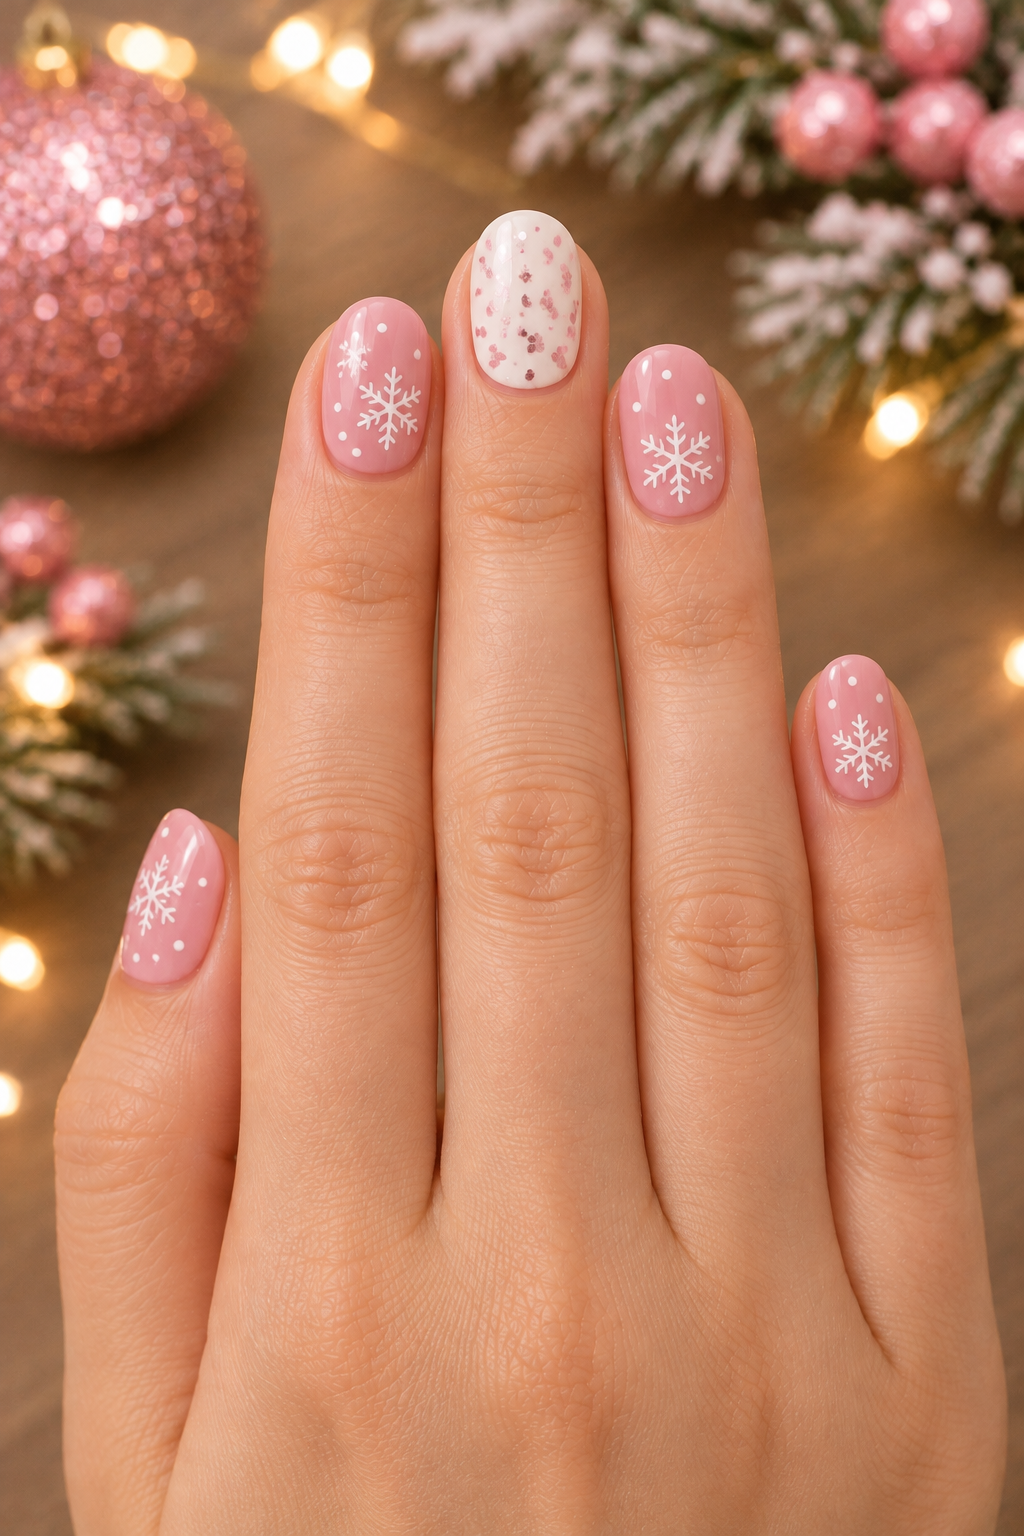
Who says Christmas nails always need to be red and green? A soft pink and white combination creates a sweet, feminine winter manicure.
Apply blush-pink polish to most of your nails and use white polish on one or two accent nails. Add tiny white snowflakes over the pink base and a little pink glitter over the white nails.
Keep the patterns small and delicate so the manicure doesn’t look too busy. This design is especially pretty if you enjoy soft pastel colors.
18. Simple Christmas Lights Nails
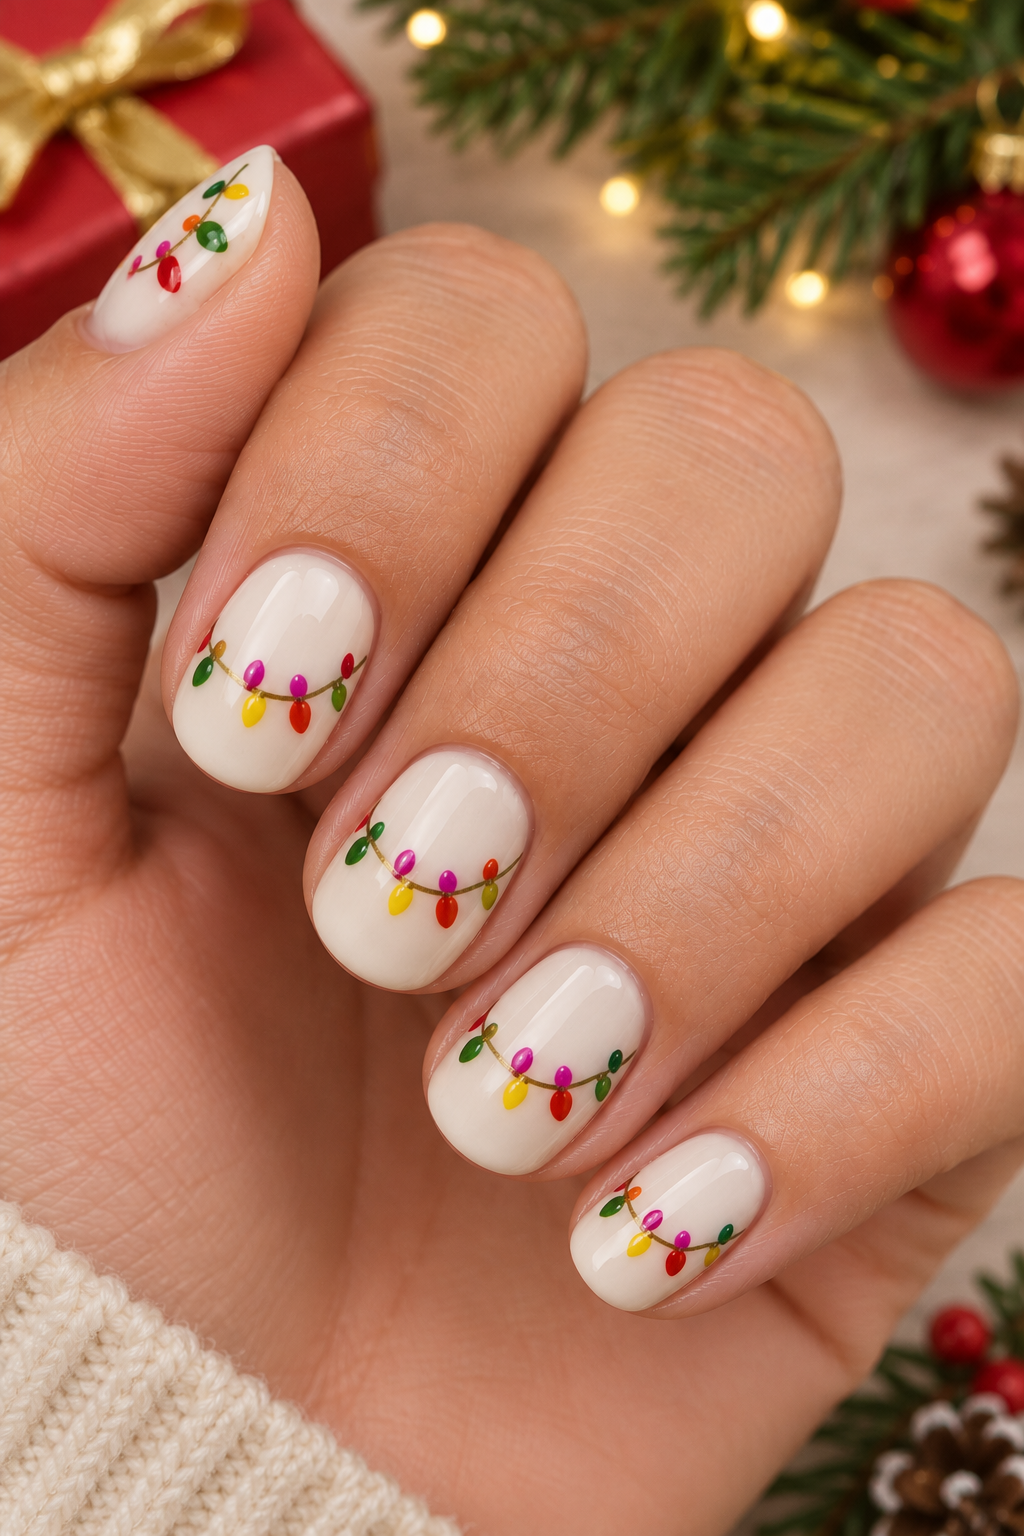
Bring the festive lights of Christmas to your manicure with this fun and easy design.
Start with a sheer nude or milky white base. Use a thin black brush to draw a slightly curved line across one or two accent nails.
Then add tiny colorful dots along the line using red, green, yellow, and blue polish to represent Christmas lights.
You don’t need perfect shapes or complicated details. Just a few small dots are enough to create the look of a glowing holiday string.
19. Icy Silver Snowflake French Tips
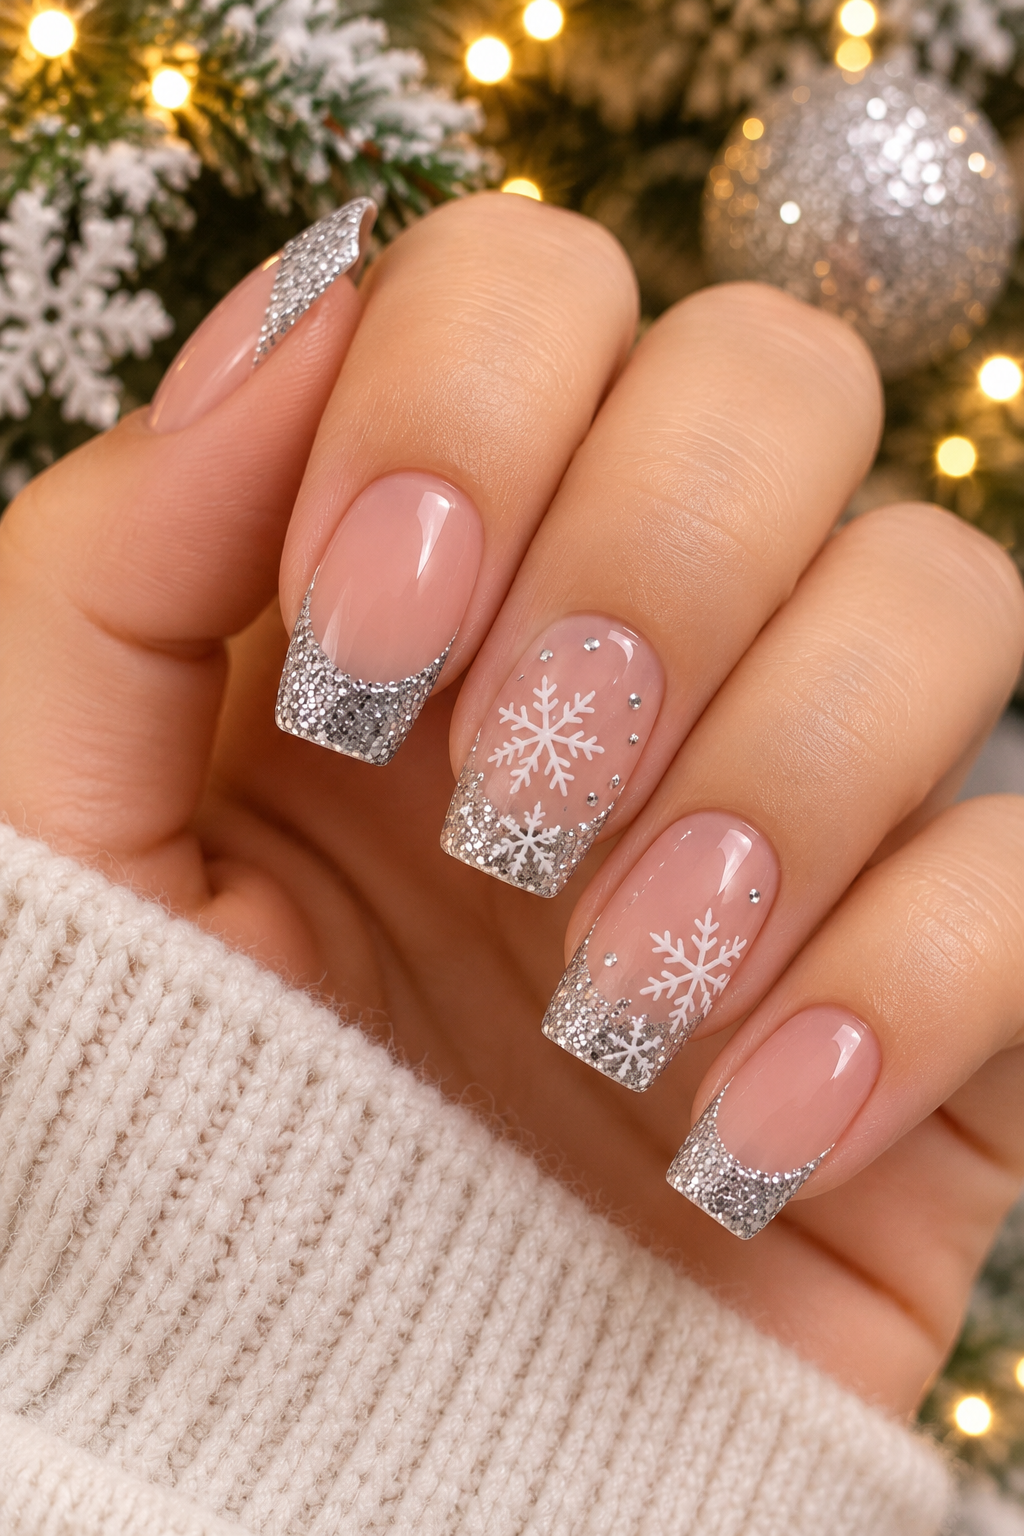
Combine a classic French manicure with delicate winter details for a beautiful icy look.
Begin with a sheer pink or nude base and paint the tips using silver glitter polish. On one or two accent nails, add a small white snowflake using a thin brush.
A few tiny silver dots around the snowflakes will make the design look like freshly falling snow. This is a lovely choice if you want something festive without using traditional Christmas colors.
20. Red Glitter Accent Nails
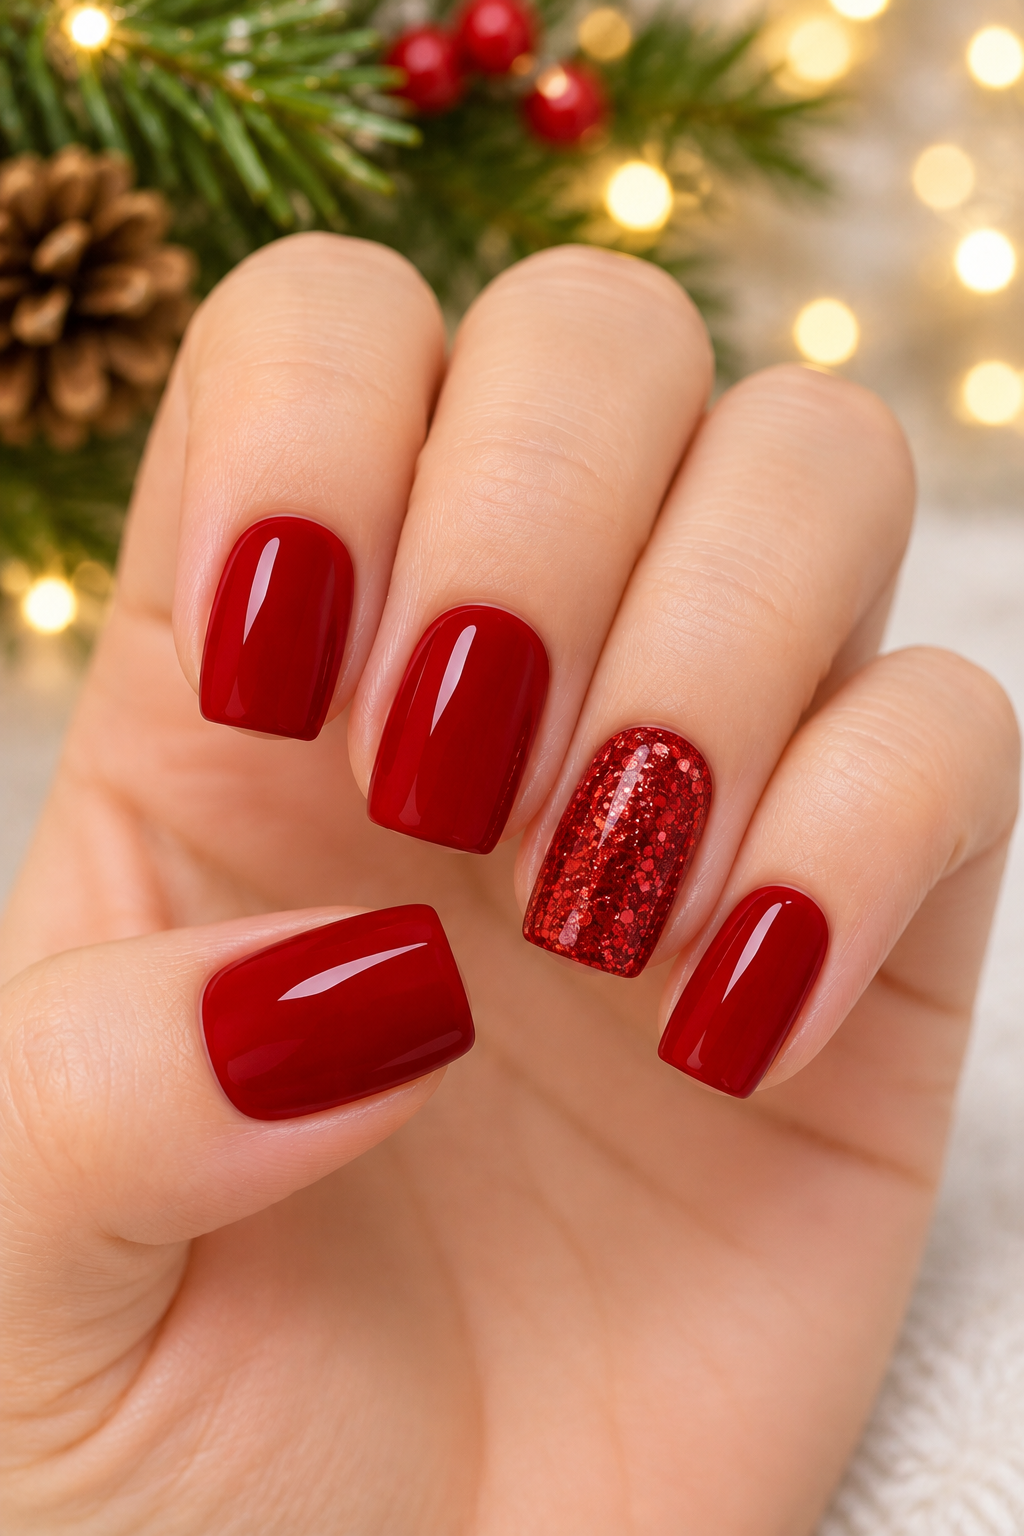
Red glitter is an easy way to add Christmas sparkle without spending too much time on nail art.
Paint most of your nails in a glossy cherry-red shade. Choose one accent nail on each hand and apply fine red glitter polish.
You can also use a clear polish with red glitter particles for a softer finish. Keep the rest of the nails simple to let the glitter accents stand out.
This manicure is perfect for Christmas parties, family gatherings, and festive celebrations.
21. Minimal Christmas Ornament Nails
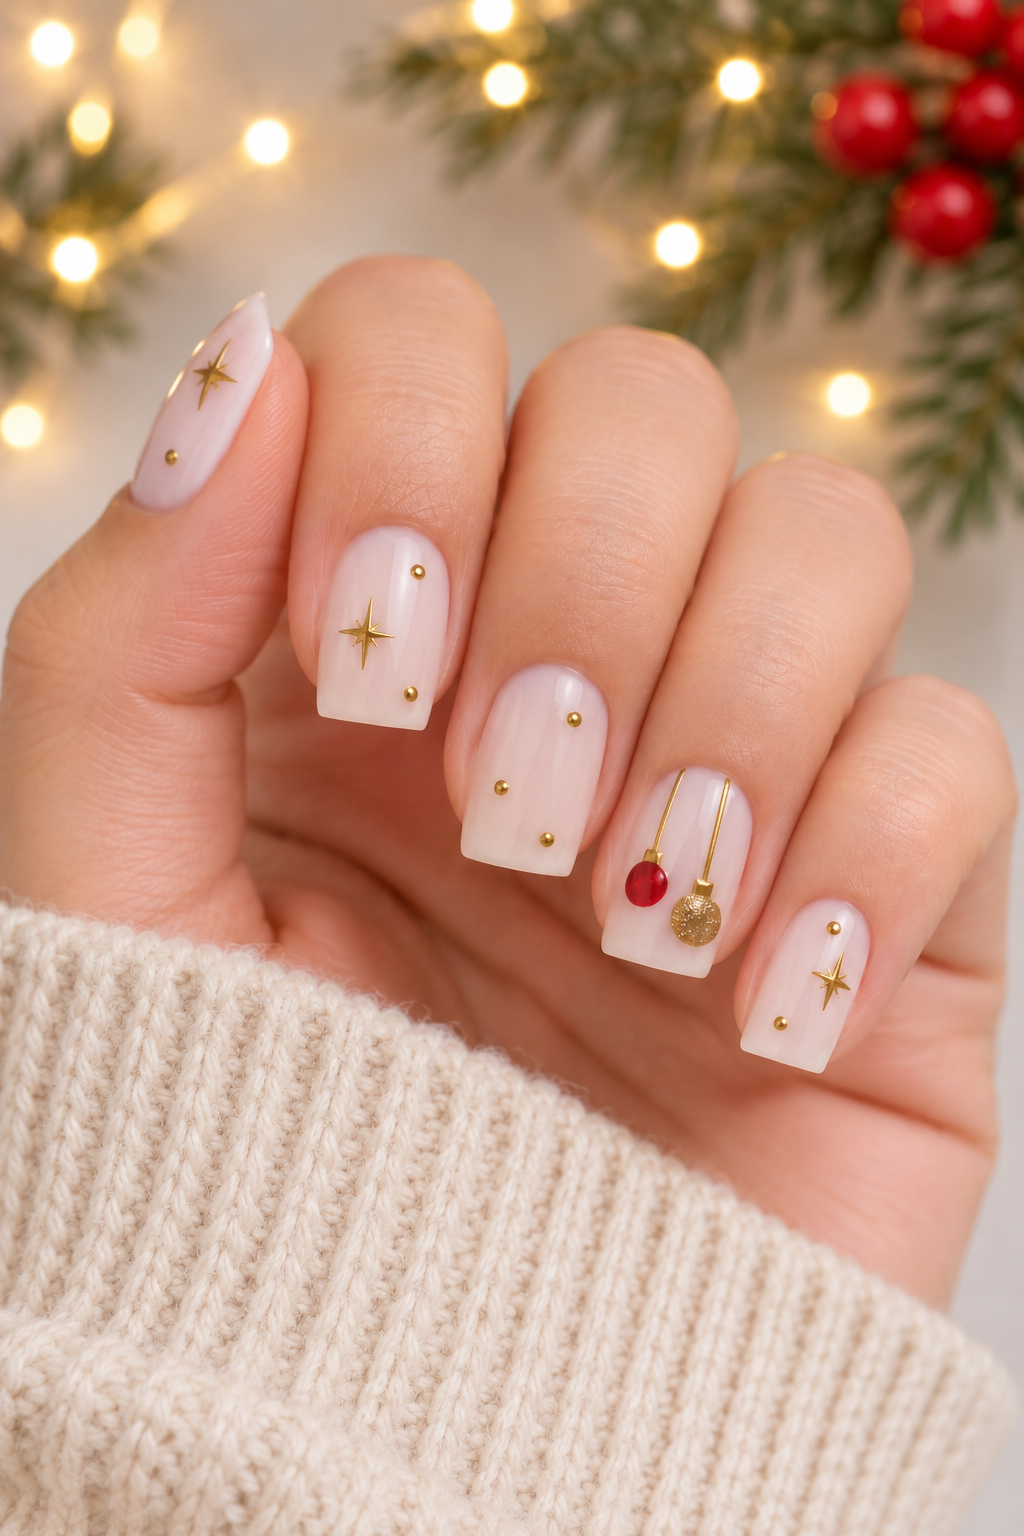
Tiny Christmas ornaments can make even the simplest manicure look special.
Apply a milky white or nude base to all your nails. On one accent nail, paint two small circles in red and gold to represent Christmas baubles.
Add a tiny gold line above each circle to create the hanging string. You can also add a small gold dot or star on the remaining nails.
This design is simple, creative, and easy to recreate using a dotting tool.
22. Chocolate Brown Winter Nails
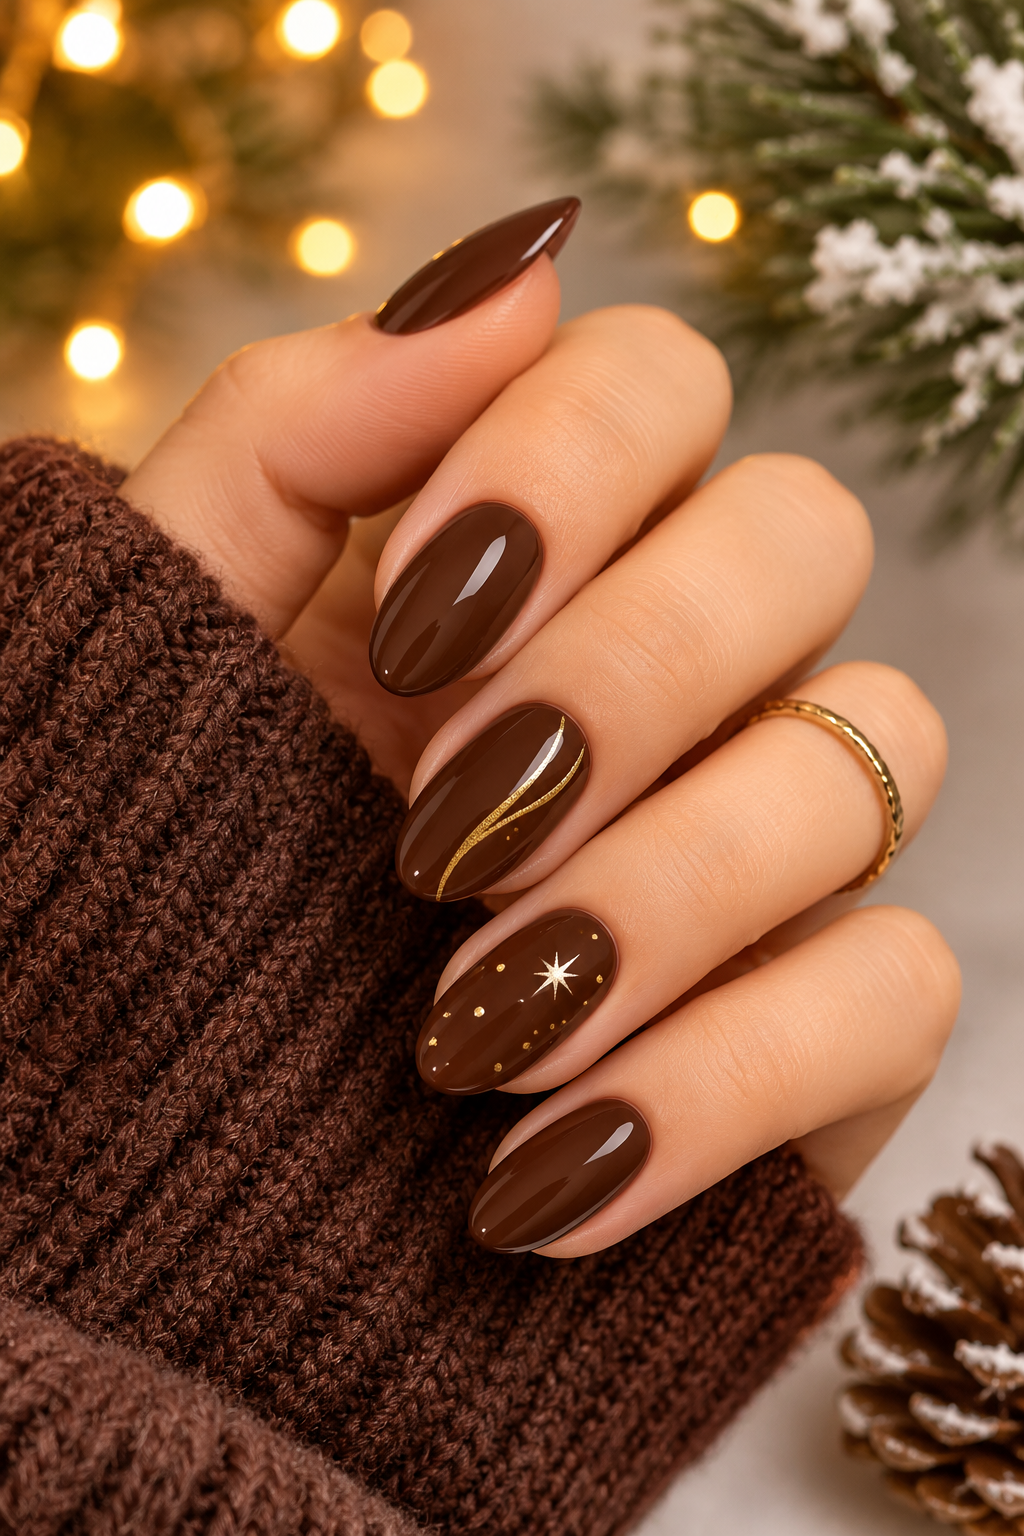
Chocolate brown is a beautiful winter shade that offers something different from the usual Christmas colors.
Apply a rich chocolate-brown polish to all your nails. For a subtle festive touch, add a thin gold line, tiny gold dots, or a small white star on one or two accent nails.
You can also choose a lighter caramel-brown shade for a softer look. The warm tones make this manicure feel cozy, elegant, and easy to wear throughout winter.
23. Midnight Blue Snowflake Nails
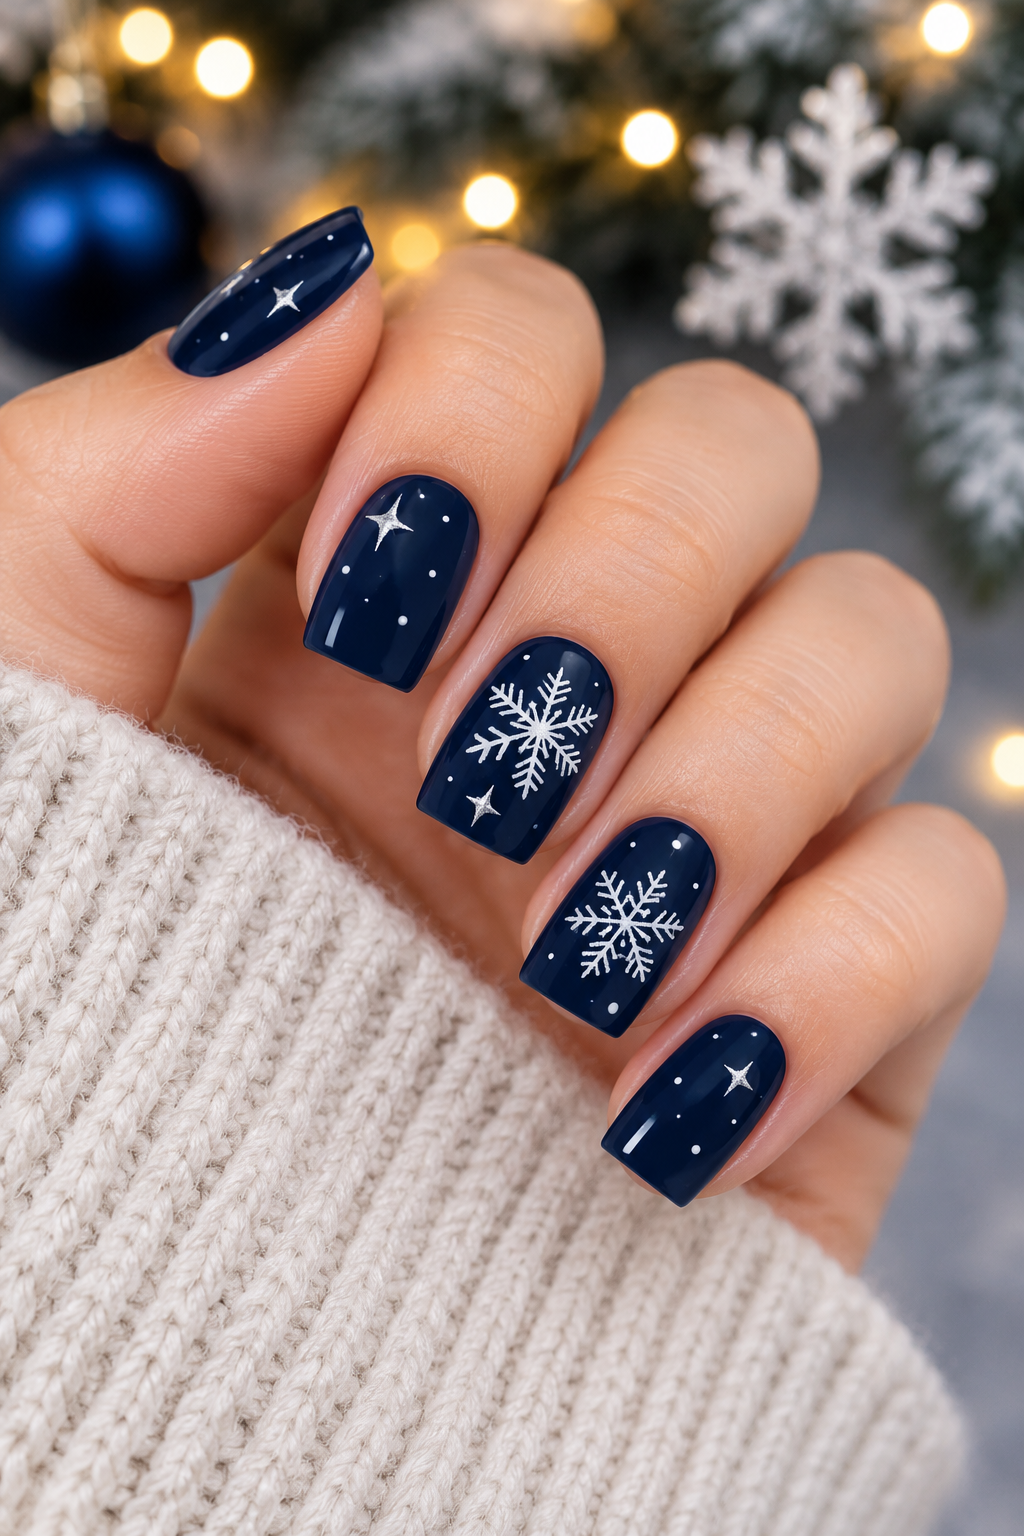
Finish your Christmas manicure inspiration with a beautiful midnight-blue design. The deep navy shade creates the perfect background for delicate white snowflakes.
Apply two coats of navy-blue polish and let them dry. On two accent nails, paint small white snowflakes using a thin nail art brush. Add tiny white dots and a few little silver stars to the remaining nails.
You can keep the design minimal or add a touch of silver glitter for extra sparkle. It’s a gorgeous winter manicure that looks detailed but is still achievable at home.
Easy Tips for Creating Christmas Nail Art at Home
You don’t need professional nail tools to recreate these Christmas nail ideas. A few basic supplies and some patience can help you achieve beautiful results.
-
Use thin polish coats: Two thin coats usually give a smoother finish than one thick coat.
-
Try a toothpick for dots: You can create snow, berries, stars, and polka dots with a simple toothpick.
-
Use a thin nail art brush: It’s helpful for drawing snowflakes, Christmas trees, stripes, and tiny lines.
-
Let each layer dry: Give your base color enough time to dry before adding nail art.
-
Don’t overcrowd your nails: A few small festive details often look prettier than too many decorations.
-
Seal everything with a top coat: A glossy or matte top coat helps protect your nail art and gives your manicure a finished appearance.
Final Thoughts
Christmas nails don’t have to be complicated to look beautiful. From classic red polish and green French tips to tiny snowflakes, candy cane stripes, and adorable Christmas trees, there are so many creative ways to make your manicure festive.
The best part about these 23 simple Christmas nail ideas is that they are realistic, beginner-friendly, and easy to customize. You can recreate them on short or long nails, change the colors to match your holiday outfits, or combine a few simple details to make your own design.
Pick your favorite look, grab your nail polish, and enjoy creating a pretty Christmas manicure at home!